
20-Minute Cardio Workout You Can Do in Your Living Room

20-Minute Cardio Workout You Can Do in Your Living Room

Woman performing high knees cardio exercise in her living room

The gym is closed. It is raining outside. You have exactly 20 minutes before your next commitment and zero equipment within reach. Most people in this situation do nothing, telling themselves they will make it up tomorrow.

Here is what you need to know: 20 minutes of focused cardio in your living room can match the cardiovascular benefit of a 45 minute moderate gym session. You have a living room. You have 20 minutes. That is genuinely enough. Here is exactly what to do with both.

Why Home Cardio Works as Well as the Gym

The gym is not magic. The treadmill does not burn calories more efficiently than your living room floor. What the gym provides is equipment variety, dedicated space, and the psychological commitment of having traveled somewhere specifically to exercise.

A well-designed cardio workout at home removes the equipment requirement while retaining everything else that actually matters: progressive intensity, adequate duration, and full-body engagement.

Your heart does not care whether it is pumping hard because of a stationary bike or because of a set of explosive burpees in front of your sofa. The cardiovascular demand, and the resulting fitness improvement, is the same. What changes is only the environment.

What You Need Before You Start

The equipment list for this workout is short:

  • A clear space approximately two meters by two meters, enough room to lie down and extend your arms overhead
  • Comfortable athletic shoes or bare feet on a non-slip surface
  • A water bottle within reach
  • A timer on your phone

That is it. No mat is required, though a yoga mat adds comfort if you have one. The workout is structured in three phases: a warm-up, the main cardio circuit, and a cooldown.

Warm-Up3 min
Main Circuit15 min
Cooldown2 min
Total session time: ~20 minutes

Phase 1: Warm-Up (3 Minutes)

Move through each exercise continuously, no stopping:

1
Marching in Place
40 sec
2
Arm Circles
20 sec each way
3
Hip Circles
30 sec
4
Torso Twists
30 sec
5
Light Jumping Jacks
40 sec

Lift your knees comfortably to hip height while swinging your arms to begin elevating your heart rate. Move through large controlled arm circles, slow hip circles, and controlled torso twists to mobilize the joints and warm the core. By the end of the light jumping jacks, you should feel warm and your breathing should be noticeably deeper than at rest. You are now ready for the main circuit.

Phase 2: The Main Cardio Circuit (15 Minutes)

This circuit has six exercises. Each runs for 40 seconds of work followed by 20 seconds of rest before moving to the next movement. Complete the full circuit twice with a 60-second rest between rounds. This structure, known as interval training, is specifically designed to keep your heart rate elevated throughout the session.

01
High Knees
40 sec work

Stand with feet hip-width apart. Drive your right knee up toward your chest while pumping your left arm forward, then switch rapidly, left knee up, right arm forward, maintaining a quick, bouncy rhythm. This is not a jog, it is an intentionally fast and rhythmic movement that should leave you breathing heavily by the 20-second mark.

Modification: Perform slow marching with exaggerated high knee lifts if impact is a concern.

02
Squat to Lateral Step
40 sec work

Stand with feet together. Step your right foot out wide into a squat, hold briefly at the bottom, then step your left foot to meet it and stand. Step back out to the right for 20 seconds, then switch direction. Your quadriceps, glutes and inner thigh muscles are all engaged throughout, with lower impact than jumping exercises.

03
Burpees
40 sec work

Stand tall. Place your hands on the floor, jump or step your feet back to a plank position, perform a push-up if you can, jump your feet back toward your hands, and explode upward into a jump with arms overhead. This is the most demanding exercise in the circuit, and the most rewarding, engaging every major muscle group simultaneously.

Modification: Remove the jump at the top and step back rather than jumping to the plank position.

04
Shadow Boxing
40 sec work

Stand in a comfortable stance, one foot slightly ahead of the other, hands loosely raised. Throw alternating punches, jabs, crosses, hooks, at a continuous pace, moving your feet slightly between combinations. Focus on rotating your torso with each punch rather than just moving your arms, this is what engages the obliques and generates real effort.

05
Alternating Reverse Lunges
40 sec work

Stand tall with feet together. Step your right foot back into a reverse lunge, lower your back knee toward the floor, then drive back up to standing. Immediately step your left foot back and repeat, alternating legs continuously. Keep your chest tall, your front knee above your ankle, and your core lightly engaged.

06
Jumping Jacks With Crossover Arms
40 sec work

Perform a standard jumping jack, feet out wide, arms up, but on the return bring your arms across your chest in a crossover rather than down to your sides. This serves as the circuit closer, keeping your heart rate elevated while being low enough in intensity to complete with consistent form after five preceding exercises.

Rest between rounds, 60 seconds: Walk slowly around your space, shake out your hands and legs, take deliberate slow breaths, and drink water. Do not sit down. After 60 seconds, begin round two with the same exercise order.

Phase 3: Cooldown (2 Minutes)

After the second round, bring your heart rate down gradually before stopping completely. A sudden stop after intense cardio can cause dizziness and discomfort.

1
Slow Walking
30 sec
2
Standing Quad Stretch
20 sec each side
3
Hamstring Stretch
30 sec
4
Chest Opener
20 sec
5
Deep Breathing
30 sec

Hinge forward at the hips with soft knees for the hamstring stretch, clasp your hands behind your back for the chest opener, and finish by inhaling for four counts and exhaling for six, allowing your heart rate to settle fully.

The Complete Workout at a Glance

PhaseContentDuration
Warm-UpMarching, arm circles, hip circles, torso twists, jumping jacks3 minutes
Round 1Six exercises, 40 sec work / 20 sec rest each6 minutes
RestSlow walking, water, breathing1 minute
Round 2Six exercises, 40 sec work / 20 sec rest each6 minutes
CooldownStretches, deep breathing2 minutes
Total18 to 20 minutes

How Often Should You Do This Workout

Three to four times per week is the ideal frequency for this cardio workout at home. This provides enough cardiovascular stimulus to improve fitness and burn fat meaningfully while allowing adequate recovery. On off days, lighter activity, a walk, stretching or a yoga session, keeps you active without adding cardiovascular stress.

As your fitness improves, progression is simple:

  • Increase work intervals from 40 to 45 seconds while keeping rest at 20 seconds
  • Add a third round for a 25 to 28 minute total session
  • Reduce the inter-round rest from 60 to 45 seconds
  • Increase the speed and intensity of each exercise rather than changing the structure

Why Consistency Beats Perfection Every Single Time

Many beginners approach home cardio with the expectation that every session needs to be perfect, maximum effort, full form throughout, no modifications. When reality falls short of that standard, they feel like the workout did not count.

It counts. A moderate effort performed four times a week produces far better results than a perfect effort performed once. That gradual progression, not perfection from day one, is what builds real, lasting cardiovascular fitness.

Your Living Room Cardio Quick Start Checklist

  • Clear a 2 by 2 meter space and set a timer
  • Never skip the 3-minute warm-up
  • Complete the 6-exercise circuit twice, 40 sec on / 20 sec off
  • Cooldown for 2 minutes before you stop completely
  • Train 3 to 4 times a week and progress gradually

Final Thoughts

You do not need a gym, a treadmill, or an hour of free time to get a genuinely effective cardio workout. You need your living room, 20 minutes, and the willingness to push yourself for short bursts of real effort.

This workout hits your heart, your lungs and your major muscle groups through six varied movements that prevent boredom and produce measurable results when practiced consistently. Three to four sessions per week, combined with sensible eating, is a formula that works, not eventually, but within weeks.

Set your timer. Clear a space. Start with the march. Everything else follows from there.

Intermittent Fasting for Beginners: Does It Really Work?

Intermittent Fasting for Beginners: Does It Really Work?

Woman happily eating a balanced breakfast with eggs, avocado and tomatoes during her eating window

Everyone seems to be talking about intermittent fasting. Your colleague lost eight kilograms doing it. A fitness influencer you follow swears by it. And yet you are still on the fence, because every time you have tried to eat less, you have ended up hungrier, more miserable, and eventually eating everything in sight at 11pm.

So the question is reasonable: does intermittent fasting for beginners actually work, or is it just another diet trend dressed up in science-sounding language? The honest answer is that it works very well for some people, moderately for others, and not at all for a few. This article covers exactly why.

What Intermittent Fasting Actually Is

Intermittent fasting is not a diet in the traditional sense. It does not tell you what to eat. It tells you when to eat. The core principle is simple: you cycle between periods of eating and periods of fasting. During the fasting window, you consume no calories, only water, black coffee and plain tea are permitted. During the eating window, you eat normally.

This distinction matters because intermittent fasting is accessible to almost anyone regardless of cuisine or food preferences. You simply shift the hours during which you eat, not what you eat.

The Most Common Intermittent Fasting Methods

There are several approaches, and choosing the right one for your lifestyle is one of the most important decisions a beginner can make.

The 5:2 Method
Normal 5 days, restricted 2 days
Difficulty

Eat normally five days a week and restrict calories to approximately 500 to 600 on two non-consecutive days. Requires more planning than 16:8.

The 24-Hour Fast
Full day fast, once or twice weekly
Difficulty

Fast from dinner one evening to dinner the following evening. A more advanced approach that most beginners find too challenging to start with.

The recommendation for beginners: start with 16:8. Give it four to six weeks before evaluating results or switching methods.

What Happens Inside Your Body When You Fast

Understanding the biology makes the whole concept feel less like deprivation and more like a deliberate physiological strategy.

0 to 10 hrs
Body uses glucose for energy. Insulin is elevated, stored fat stays untouched.
10 to 14 hrs
Glycogen stores deplete, insulin falls, body shifts to burning stored fat, the fasted state.
14 to 16 hrs
Growth hormone production increases, supporting muscle preservation and fat metabolism.

This hormonal shift is one reason intermittent fasting can produce fat loss while preserving lean muscle mass better than simple calorie restriction alone.

Does Intermittent Fasting Actually Cause Weight Loss

Yes, but with an important clarification that is often left out of the conversation. Intermittent fasting causes weight loss primarily by reducing total calorie intake. When your eating window is compressed to eight hours instead of fourteen or sixteen, most people naturally eat less.

Studies comparing intermittent fasting to continuous calorie restriction have found broadly similar weight loss results when total calorie intake is matched. In other words, intermittent fasting is not metabolically magical, it is effective because it is a practical structure that makes eating less easier for many people.

Where intermittent fasting does show unique advantages is in its effects on insulin sensitivity, metabolic health markers and inflammation, benefits that extend beyond weight loss.

The First Week: What to Expect as a Beginner

The first week of intermittent fasting for beginners is typically the hardest. Knowing what to expect prevents most people from giving up prematurely.

Days 1 to 3
The Hardest Part
  • Hunger feels urgent but passes within 20 to 30 minutes
  • Mild headaches, especially if caffeine is also reduced
  • Difficulty concentrating if skipping breakfast
  • Irritability, temporary and resolves by week end
Days 4 to 7
Noticeably Easier
  • Hunger signals begin to adapt to your new schedule
  • Many feel genuinely comfortable waiting until noon
  • Energy levels start to stabilize through the day
  • The fasting window starts to feel routine, not forced

The key insight for getting through the first week: hunger comes in waves and passes. It is simply your digestive system following its previous schedule.

What Should You Eat During Your Eating Window

This is where many beginners make a critical mistake. They complete the fast successfully and then eat enough during the eating window to cancel out any deficit the fasting period created.

Focus on
Eggs, chicken, fish, lentils
Greek yogurt, cottage cheese
Plenty of vegetables
Brown rice, oats, sweet potatoes
Avocado, olive oil, nuts, seeds
Limit
Sugary drinks
Refined carbohydrates
Fried foods
Processed snacks

These can easily create a calorie surplus even within a compressed eating window, which eliminates the weight loss benefit entirely.

Who Should Not Try Intermittent Fasting

Intermittent fasting is not appropriate for everyone, and being honest about this is important. Avoid it or consult a doctor first if you:

  • Are pregnant or breastfeeding
  • Have a history of disordered eating
  • Have type 1 diabetes or are on insulin medication
  • Are underweight or have a nutritional deficiency history
  • Are under 18 years of age
  • Have a medical condition that requires regular food intake

If you experience persistent dizziness, extreme fatigue, heart palpitations or significant disruption to your daily functioning during fasting periods, stop and consult a healthcare professional.

Practical Tips to Make Intermittent Fasting Work

  • Start with a 12-hour fast if 16 hours feels too aggressive. Shift gradually from 8am to 8pm, then 10am to 6pm, then noon to 8pm by week three
  • Stay hydrated during the fasting window, water, plain sparkling water, black coffee and herbal tea are all permitted
  • Break your fast with protein, not carbohydrates, a protein-first meal produces better blood sugar stability
  • Keep your eating window consistent, the same hours each day help your body adapt its hunger signals
  • Do not eat excessively to compensate, the most common mistake. Normal, balanced meals are enough

A Realistic Timeline for Results

Beginners often expect dramatic results within the first week and become discouraged when the scale barely moves. Here is a more accurate timeline:

1

Week One: Adaptation

Hunger management, routine building, and possibly a small drop in water weight.

2

Weeks Two to Four

The fasting window becomes comfortable, energy levels stabilize, and genuine fat loss begins to show.

3

Month Two and Beyond

Consistent progress becomes visible, typically one to two pounds of fat loss per week when managed sensibly.

Your Intermittent Fasting Quick Start Checklist

  • Start with the 16:8 method for at least 4 weeks
  • Drink water, black coffee or tea during your fast
  • Eat protein-focused, balanced meals in your window
  • Push through days 1 to 3, they get easier fast
  • Give it a full month before judging the results

Final Thoughts

Intermittent fasting for beginners works, not because it is magical, but because it is practical. It gives you a clear, simple structure that naturally reduces calorie intake, improves insulin sensitivity, and makes healthy eating decisions easier.

The first week is the hardest. The second week is significantly easier. By week three or four, most beginners find that the eating window feels completely natural and the fasting period requires almost no willpower at all.

Start with 16:8. Drink water during your fasting window. Eat protein-focused, balanced meals when your window opens. Give it a full month before judging whether it is working. The results follow from the consistency.

Sleep and Fitness: Why Rest Days Matter

Sleep and Fitness: Why Rest Days Matter

Woman lifting weights next to a woman sleeping peacefully in bed, representing training and recovery

You have been training hard. Every day, no days off, full commitment. You are proud of the consistency, and yet something is not adding up. Your performance is declining instead of improving. Your muscles ache constantly rather than occasionally.

You are not being lazy. You are overtrained. And the missing piece is not more exercise, it is rest. Your body does not get stronger during your workout. It gets stronger during your recovery. This article is going to change how you think about rest, and by extension, how you train.

What Actually Happens During a Workout

When you lift weights, run, or perform any form of intense physical activity, you are creating controlled damage. Your muscle fibres develop microscopic tears under the mechanical load. Your glycogen stores, the fuel your muscles run on, become depleted. Your nervous system experiences significant fatigue, and your joints and connective tissues are placed under sustained stress.

None of this is a bad thing. It is the necessary stimulus for adaptation. But the adaptation itself, the muscle repair, the strength increase, the cardiovascular improvement, does not happen while you are exercising. It happens afterward, during recovery, and most significantly during sleep.

Skip the recovery, and you accumulate damage without the repair. That is the definition of overtraining.

What Sleep Does for Your Fitness

While you are unconscious, your body is doing some of its most sophisticated and important work, and much of it is directly relevant to your fitness goals.

Growth Hormone Release

Human growth hormone, the primary driver of muscle repair and fat metabolism, is secreted in its largest pulses during deep sleep. Cut your sleep short and you cut this process short.

Protein Synthesis Peaks

Muscle protein synthesis is elevated during sleep, particularly if you consumed protein earlier in the day. The protein you eat provides the raw material, sleep provides the construction time.

Nervous System Recovers

Intense exercise taxes your central nervous system. A well-rested athlete consistently outperforms a fatigued one, even with identical training histories.

Cortisol Is Regulated

Chronic elevation of cortisol breaks down muscle tissue and promotes fat storage. Sleep is one of the most effective mechanisms for bringing cortisol back to a healthy baseline.

How Much Sleep Do Fitness Goals Require

The standard recommendation of seven to nine hours per night is a good general guideline. But for people training consistently, the research suggests the higher end, eight to nine hours, produces measurably better outcomes.

A study from Stanford University found that basketball players who extended their sleep to ten hours per night showed significant improvements in sprint times, shooting accuracy, reaction time and reported energy levels. No changes were made to their training or nutrition. Sleep alone drove the improvements.

For the average person, eight hours is a realistic and well-supported target. Less than seven hours consistently has been linked to:

  • Reduced strength output during training sessions
  • Slower muscle recovery between workouts
  • Increased injury risk due to impaired coordination and tissue repair
  • Greater appetite and stronger cravings for high-calorie foods
  • Reduced fat loss even when caloric intake is controlled

Why Rest Days Are Not Optional

A rest day does not mean you failed. It means you understand how adaptation works. When you train the same muscle groups day after day without adequate rest, several things happen, none of them good. The micro-tears in muscle tissue accumulate faster than the body can repair them, leading to chronic soreness and eventually injury.

The person who trains four days a week and rests three will, over time, consistently outperform the person who trains seven days a week without recovery, because the four-day person's workouts are productive, while the seven-day person's workouts are increasingly counterproductive.

Active Recovery Versus Passive Rest

Rest days do not have to mean lying on the couch doing nothing, though that is sometimes exactly what your body needs.

Passive Rest

Complete physical rest, no structured exercise, minimal physical demand. Most appropriate when you are genuinely exhausted, feel the early signs of overtraining, or just finished an unusually intense training block.

VS

Active Recovery

Light, low-intensity movement that promotes circulation without creating additional training stress. Walking, gentle stretching, yoga, an easy swim, or a light cycle all qualify.

Active recovery increases blood flow to muscles, reduces the buildup of lactic acid that contributes to soreness, keeps joints mobile, and offers the psychological benefit of staying active without the pressure of a full workout. For most people, one or two days of active recovery and one day of complete passive rest per week is a practical and effective structure.

Signs You Are Not Getting Enough Recovery

Your body communicates clearly when it is under-recovered. If you recognize three or more of these consistently, your body is telling you to rest more than you currently are.

  • Persistent muscle soreness that does not resolve within 48 to 72 hours of a workout
  • Declining performance: weights that felt manageable last week feel heavy this week
  • Elevated resting heart rate in the morning, noticeably above your normal baseline
  • Disrupted sleep: difficulty falling asleep or staying asleep despite feeling tired
  • Mood changes: unusual irritability, low motivation, or a sense of dread before training sessions
  • Increased susceptibility to illness: frequent colds or minor infections indicating immune suppression
  • Constant fatigue that does not improve after a normal night of sleep

Practical Tips to Improve Sleep Quality

  • Keep a consistent sleep and wake time, even on weekends. Your circadian rhythm regulates growth hormone and cortisol according to your internal clock
  • Make your bedroom cool and dark, your core body temperature needs to drop slightly to initiate and maintain deep sleep
  • Stop training within two hours of bedtime, intense exercise elevates core body temperature and cortisol, both interfering with sleep onset
  • Avoid caffeine after 2pm, caffeine has a half-life of approximately five to six hours
  • Eat a small protein-rich snack before bed, cottage cheese, Greek yogurt or a boiled egg supports overnight muscle protein synthesis
  • Limit screen exposure in the hour before sleep, blue light suppresses melatonin and signals your brain that it is still daytime

Building Recovery Into Your Training Schedule

A sustainable training schedule treats recovery as a non-negotiable component rather than an optional extra. Here is what a well-structured week might look like for someone training three to four days per week:

Mon
Training
Tue
Active walk
Wed
Training
Thu
Rest or yoga
Fri
Training
Sat
Easy swim
Sun
Complete rest
Training session
Active recovery
Complete rest

This structure provides three productive training sessions, two active recovery days, and two genuine rest days per week. Every training session is performed with a recovered nervous system and replenished energy stores, which means every session actually produces the adaptation it is designed to create.

Your Recovery Quick Start Checklist

  • Aim for 8 hours of sleep on training days
  • Train 3 to 4 days a week with real rest between
  • Mix active recovery days with complete rest days
  • Watch for overtraining signs and act on them early
  • Keep a consistent sleep and wake time every day

Final Thoughts

Rest is not the absence of progress. It is where progress actually happens. Every hour of quality sleep, every well-timed rest day, and every active recovery session is contributing directly to the strength gains, fat loss and fitness improvements you are working toward.

The training is the stimulus. Sleep and recovery are the response, and without the response, the stimulus produces nothing. Train hard, then recover just as seriously.

The results you are after are built not just in the gym, but in every quality hour of sleep and every unapologetically taken rest day. Start treating both with the same respect you give your workouts, and watch what happens to your progress.

Quick & Healthy Lunch Box Ideas for Office

Quick & Healthy Lunch Box Ideas for Office

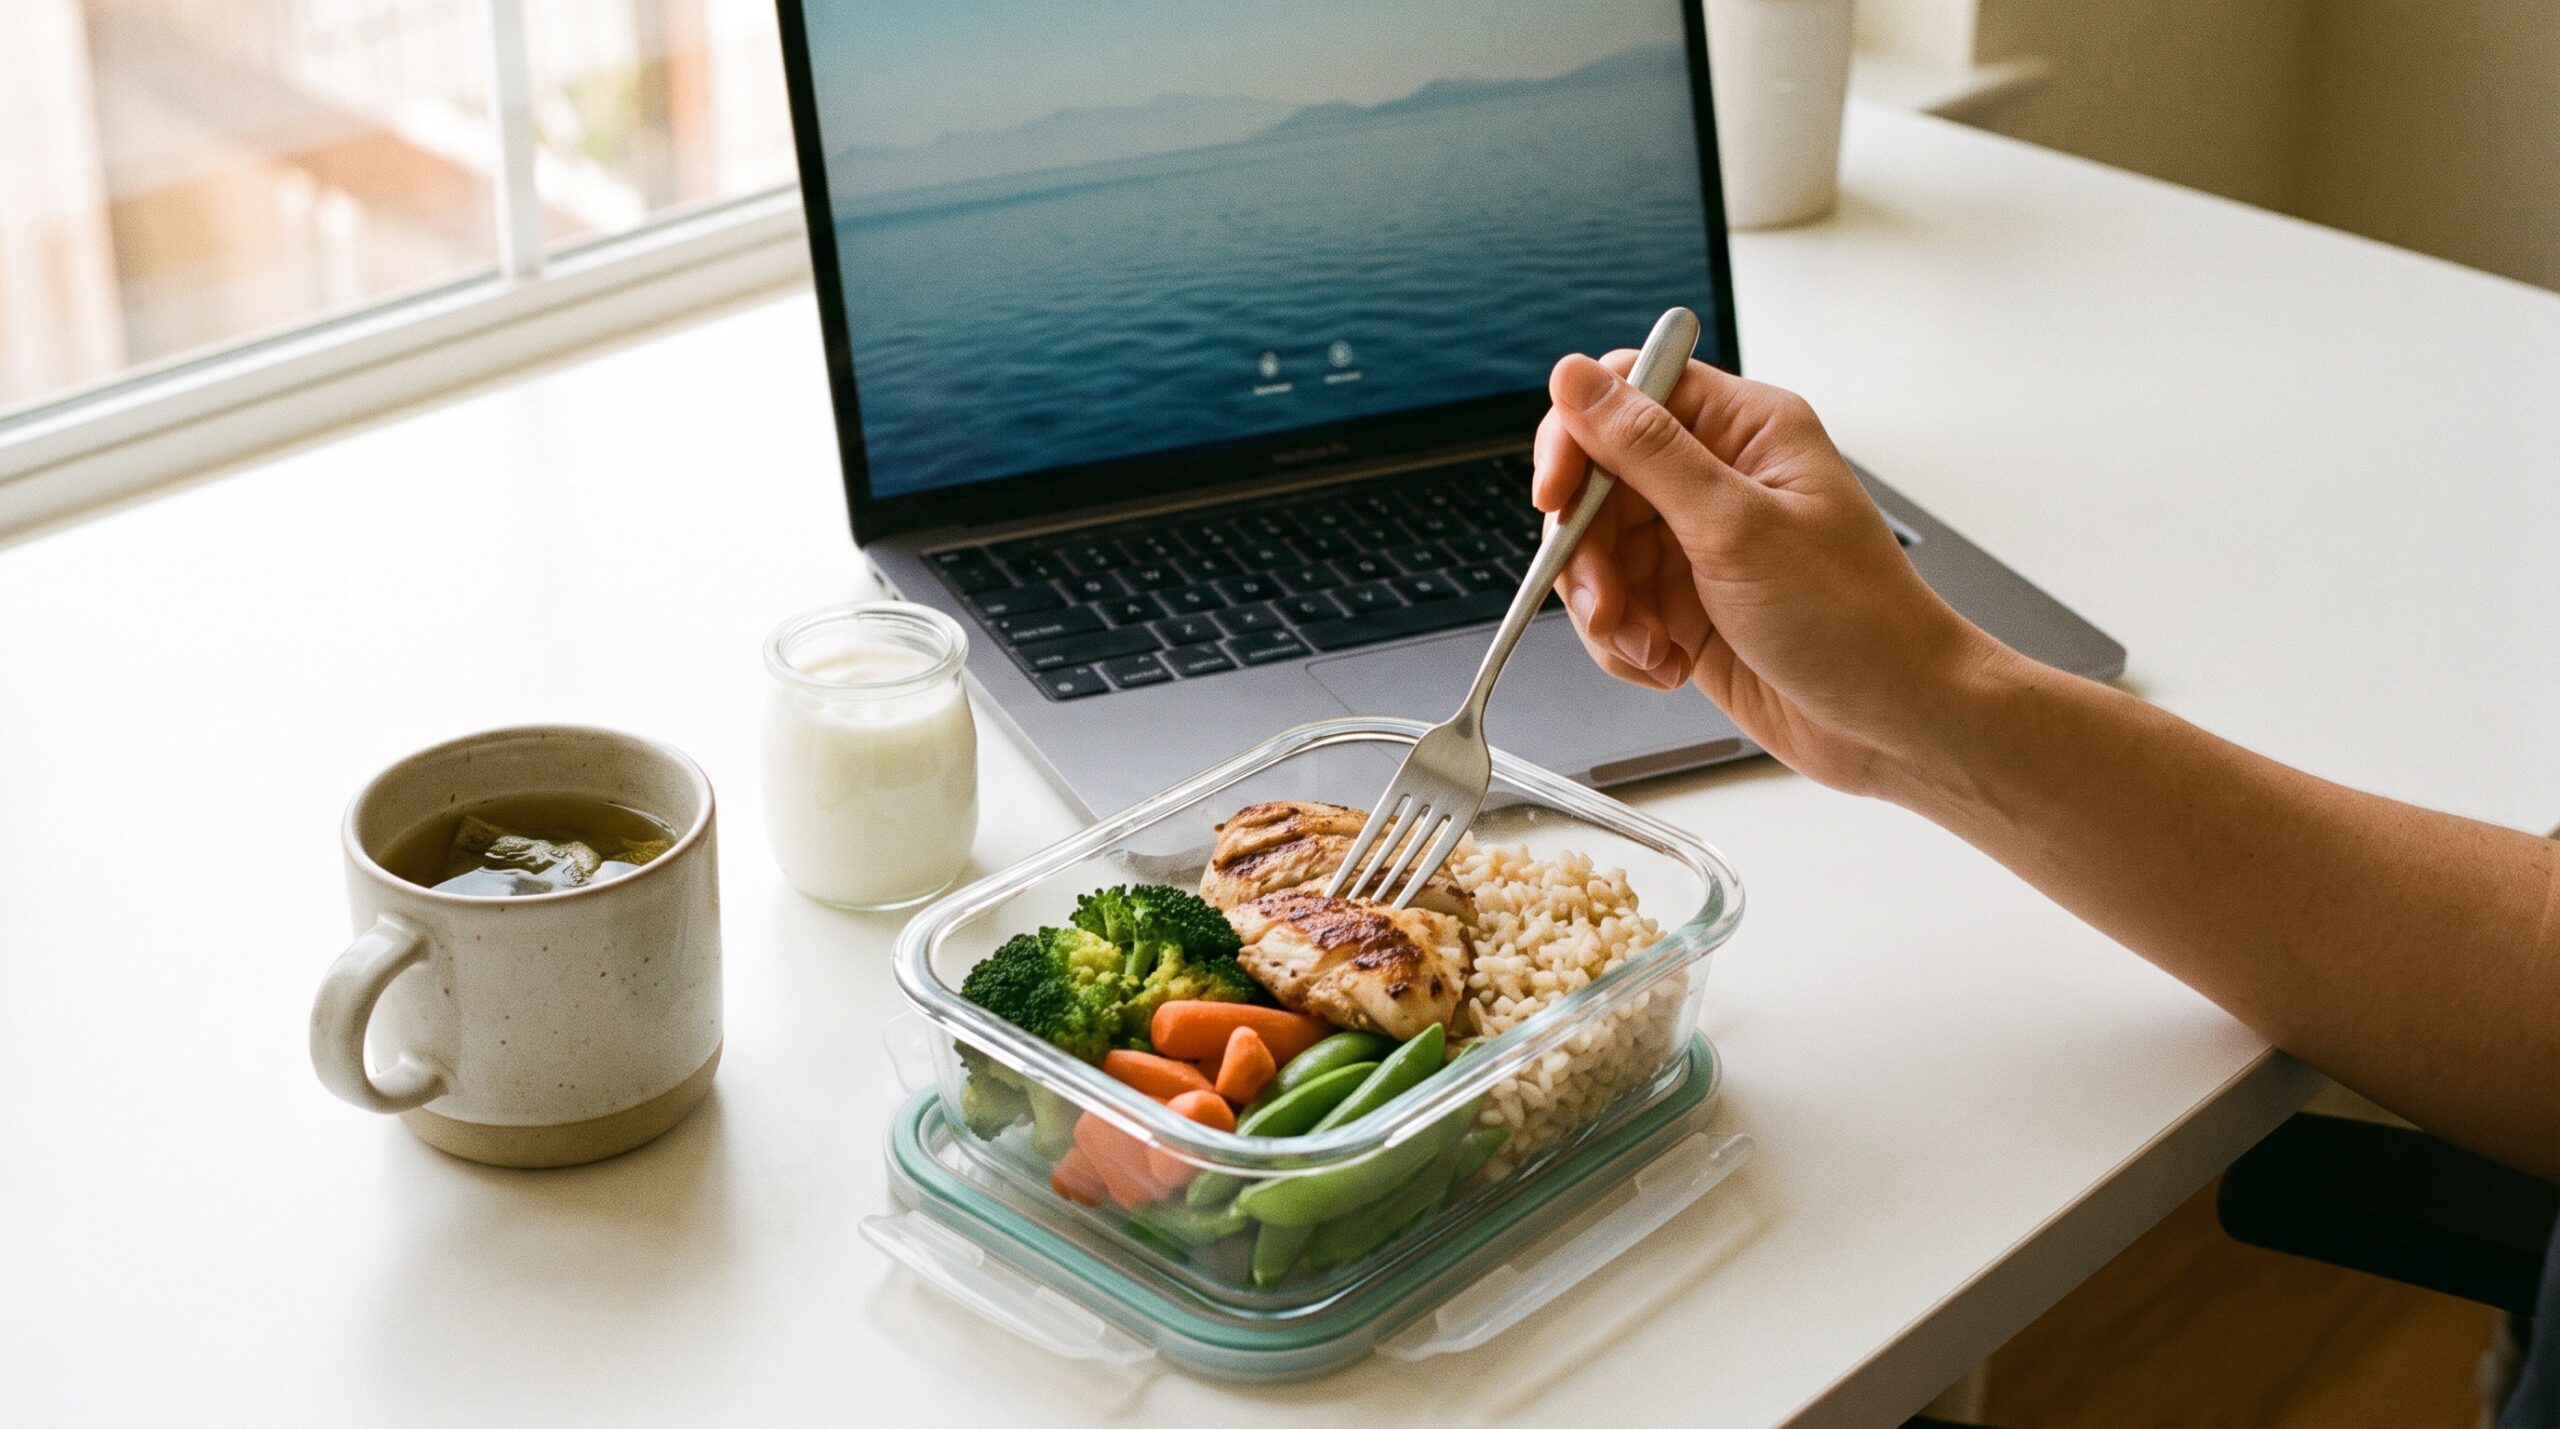
Person eating a healthy packed lunch box with chicken, rice and vegetables at an office desk

It is 1pm. You are at your desk, slightly hungry, and staring at the same three options you have had all week, an overpriced meal from the canteen that leaves you sleepy for the rest of the afternoon, a bag of chips from the vending machine, or just skipping lunch entirely and hoping your coffee carries you to 5pm.

Here is the honest truth: what you eat at lunch has a direct impact on your energy, your focus and your productivity for the entire second half of your day. The solution is a packed lunch that is quick to prepare, genuinely nutritious, and tasty enough that you actually look forward to eating it. Here is everything you need to make that happen.

Why Packing Your Own Lunch Changes Everything

When you pack your own lunch, you control three things that the canteen or restaurant never will: the ingredients, the portions and the nutritional balance. A homemade lunch built around protein, fiber and complex carbohydrates keeps your blood sugar stable throughout the afternoon. That means no energy crash, no desperate need for a sugary snack at 3pm, and sharper focus during your most productive hours.

A heavy, oily lunch spikes your blood sugar and then crashes it, which is exactly why so many people feel foggy and unmotivated between 2pm and 4pm. It also removes a daily decision from your plate. When lunch is already packed, you just eat, recharge and get back to it.

The Formula for a Perfect Office Lunch Box

You do not need a recipe for every single day. You need a formula that you can apply to whatever ingredients you have available:

Protein Source
+
Complex Carb
+
Plenty of Vegetables
+
Healthy Fat
+
Something Fresh
=
Balanced Lunch

Apply this formula to any combination of ingredients and you will consistently build lunch boxes that are balanced, filling and genuinely good for you.

6 Quick and Healthy Lunch Box Ideas

1
Chicken and Brown Rice Bowl
What to include
Cooked brown or multigrain rice
Grilled chicken breast, sliced
Stir-fried peppers, broccoli, carrots
Lemon, olive oil, black pepper
Pumpkin or sunflower seeds
Why it works

Brown rice provides slow-releasing energy that keeps blood sugar stable throughout the afternoon. Chicken breast delivers approximately 30 to 35 grams of protein per serving, enough to keep hunger away for several hours. The seeds add healthy fat and a satisfying crunch that makes the bowl feel complete rather than like a diet meal.

Prep tip: Cook a large batch of brown rice and grill four to five chicken breasts on Sunday evening. Store separately and assemble each morning in under five minutes.

2
Whole Wheat Wrap With Egg and Vegetables
What to include
One whole wheat tortilla or flatbread
Two scrambled or hard-boiled eggs
Cucumber, tomato and lettuce
Thin spread of hummus or yogurt
Black pepper and dried herbs
Why it works

Whole wheat provides fiber and complex carbohydrates. Eggs deliver complete protein with all essential amino acids. Hummus adds healthy fat and a creaminess that eliminates the need for mayonnaise or processed sauces. The vegetables add crunch, hydration and volume without meaningfully increasing calories.

Prep tip: Hard-boil a batch of eggs at the start of the week and keep them in the fridge. Assembling this wrap takes under three minutes in the morning.

3
Lentil Soup With Whole Grain Bread
What to include
Red or green lentil soup with cumin
Whole grain bread or small roll
Sliced cucumber or cherry tomatoes
Small container of plain yogurt
Why it works

Lentils are one of the most nutrient-dense foods available, high in plant-based protein, high in fiber, and deeply satisfying. A bowl of lentil soup keeps you full for three to four hours without the heaviness of a rice or bread-based meal. The yogurt on the side adds probiotics and additional protein.

Prep tip: Make a large pot over the weekend. It keeps for four to five days and reheats in minutes. Pour into a wide-mouth thermos and it stays warm until lunchtime.

4
Chickpea and Vegetable Salad
What to include
One cup canned chickpeas, rinsed
Cucumber, cherry tomatoes, red onion
Fresh parsley or coriander
Lemon juice, olive oil, salt, pepper
Optional feta or pumpkin seeds
Why it works

Chickpeas are packed with plant-based protein and fiber, a combination that produces strong, lasting satiety. The raw vegetables add crunch and hydration. The lemon and olive oil dressing is light, fresh and far lower in calories than any bottled dressing. This salad is also genuinely delicious cold, ideal for offices where microwave access might be limited.

Prep tip: Rinse and drain the chickpeas the night before. Chop the vegetables in the morning, it takes four to five minutes. Dress just before eating so everything stays crisp.

5
Brown Rice With Daal and Stir-Fried Greens
What to include
Small portion of cooked brown rice
A ladle of well-seasoned red lentil daal
Stir-fried spinach, kale or green beans
Cucumber slices or simple tomato salad
Why it works

This combination provides complete nutrition, complex carbohydrates from the rice, plant protein and fiber from the lentils, iron and micronutrients from the leafy greens, and freshness from the side salad. It is warming and genuinely comforting without being heavy, which matters when you need to stay sharp for the rest of the afternoon.

Prep tip: The ideal use of Sunday batch cooking. Make a large pot of daal, cook extra rice, and portion both into containers. Reheat together in under two minutes.

6
Boiled Egg and Avocado Box
What to include
Two hard-boiled eggs
Half an avocado, sliced
A handful of cherry tomatoes
A few whole grain crackers
Salt, pepper, squeeze of lemon
Why it works

Eggs and avocado together provide a powerful combination of complete protein and healthy fat, the two macronutrients that most effectively suppress appetite and sustain energy. The cherry tomatoes add lycopene and hydration. The crackers give a satisfying crunch and just enough complex carbohydrate to round out the meal.

Prep tip: Boil eggs in batches on Sunday and keep unpeeled in the fridge, they last the entire week. Slice the avocado fresh each morning, it takes thirty seconds.

Tips to Make Lunch Packing a Sustainable Habit

The ideas above only work if you actually follow through on them. Here is what makes lunch packing stick long term:

  • Batch cook on weekends. Spend 45 to 60 minutes on Sunday cooking grains, proteins and soups. The rest of the week becomes assembly, not cooking
  • Invest in a good quality lunch box. A leak-proof, compartmentalized container makes everything easier and stops meals from becoming a soggy mess by lunchtime
  • Keep your pantry stocked with staples. Canned chickpeas, eggs, lentils, whole grain bread and frozen vegetables mean you can always build a solid lunch
  • Prep the night before, not the morning of. Mornings are chaotic. Five minutes of lunch prep the night before removes all the stress
  • Make slightly more at dinner. Deliberately cooking a larger portion gives you leftovers that become tomorrow's lunch with zero additional effort

Your Lunch Box Quick Start Checklist

  • Follow the formula: protein, carb, veggies, fat, fresh
  • Batch cook grains and proteins once on Sunday
  • Keep pantry staples stocked for zero-cook backup meals
  • Prep the night before to remove morning stress
  • Invest in one good leak-proof lunch box

Final Thoughts

Packing a healthy lunch for the office is not about being disciplined or sacrificing taste. It is about having a simple system that makes the good choice the easy choice.

The formula is straightforward: protein, complex carbohydrates, vegetables, healthy fat and something fresh. Apply that to any of the six ideas above, prep a little on Sunday, and you will spend every workday afternoon more energized, more focused and more in control of what you are eating.

Your lunches are already decided. All that is left is to pack them.

Best Bodyweight Exercises for Fat Loss

Best Bodyweight Exercises for Fat Loss

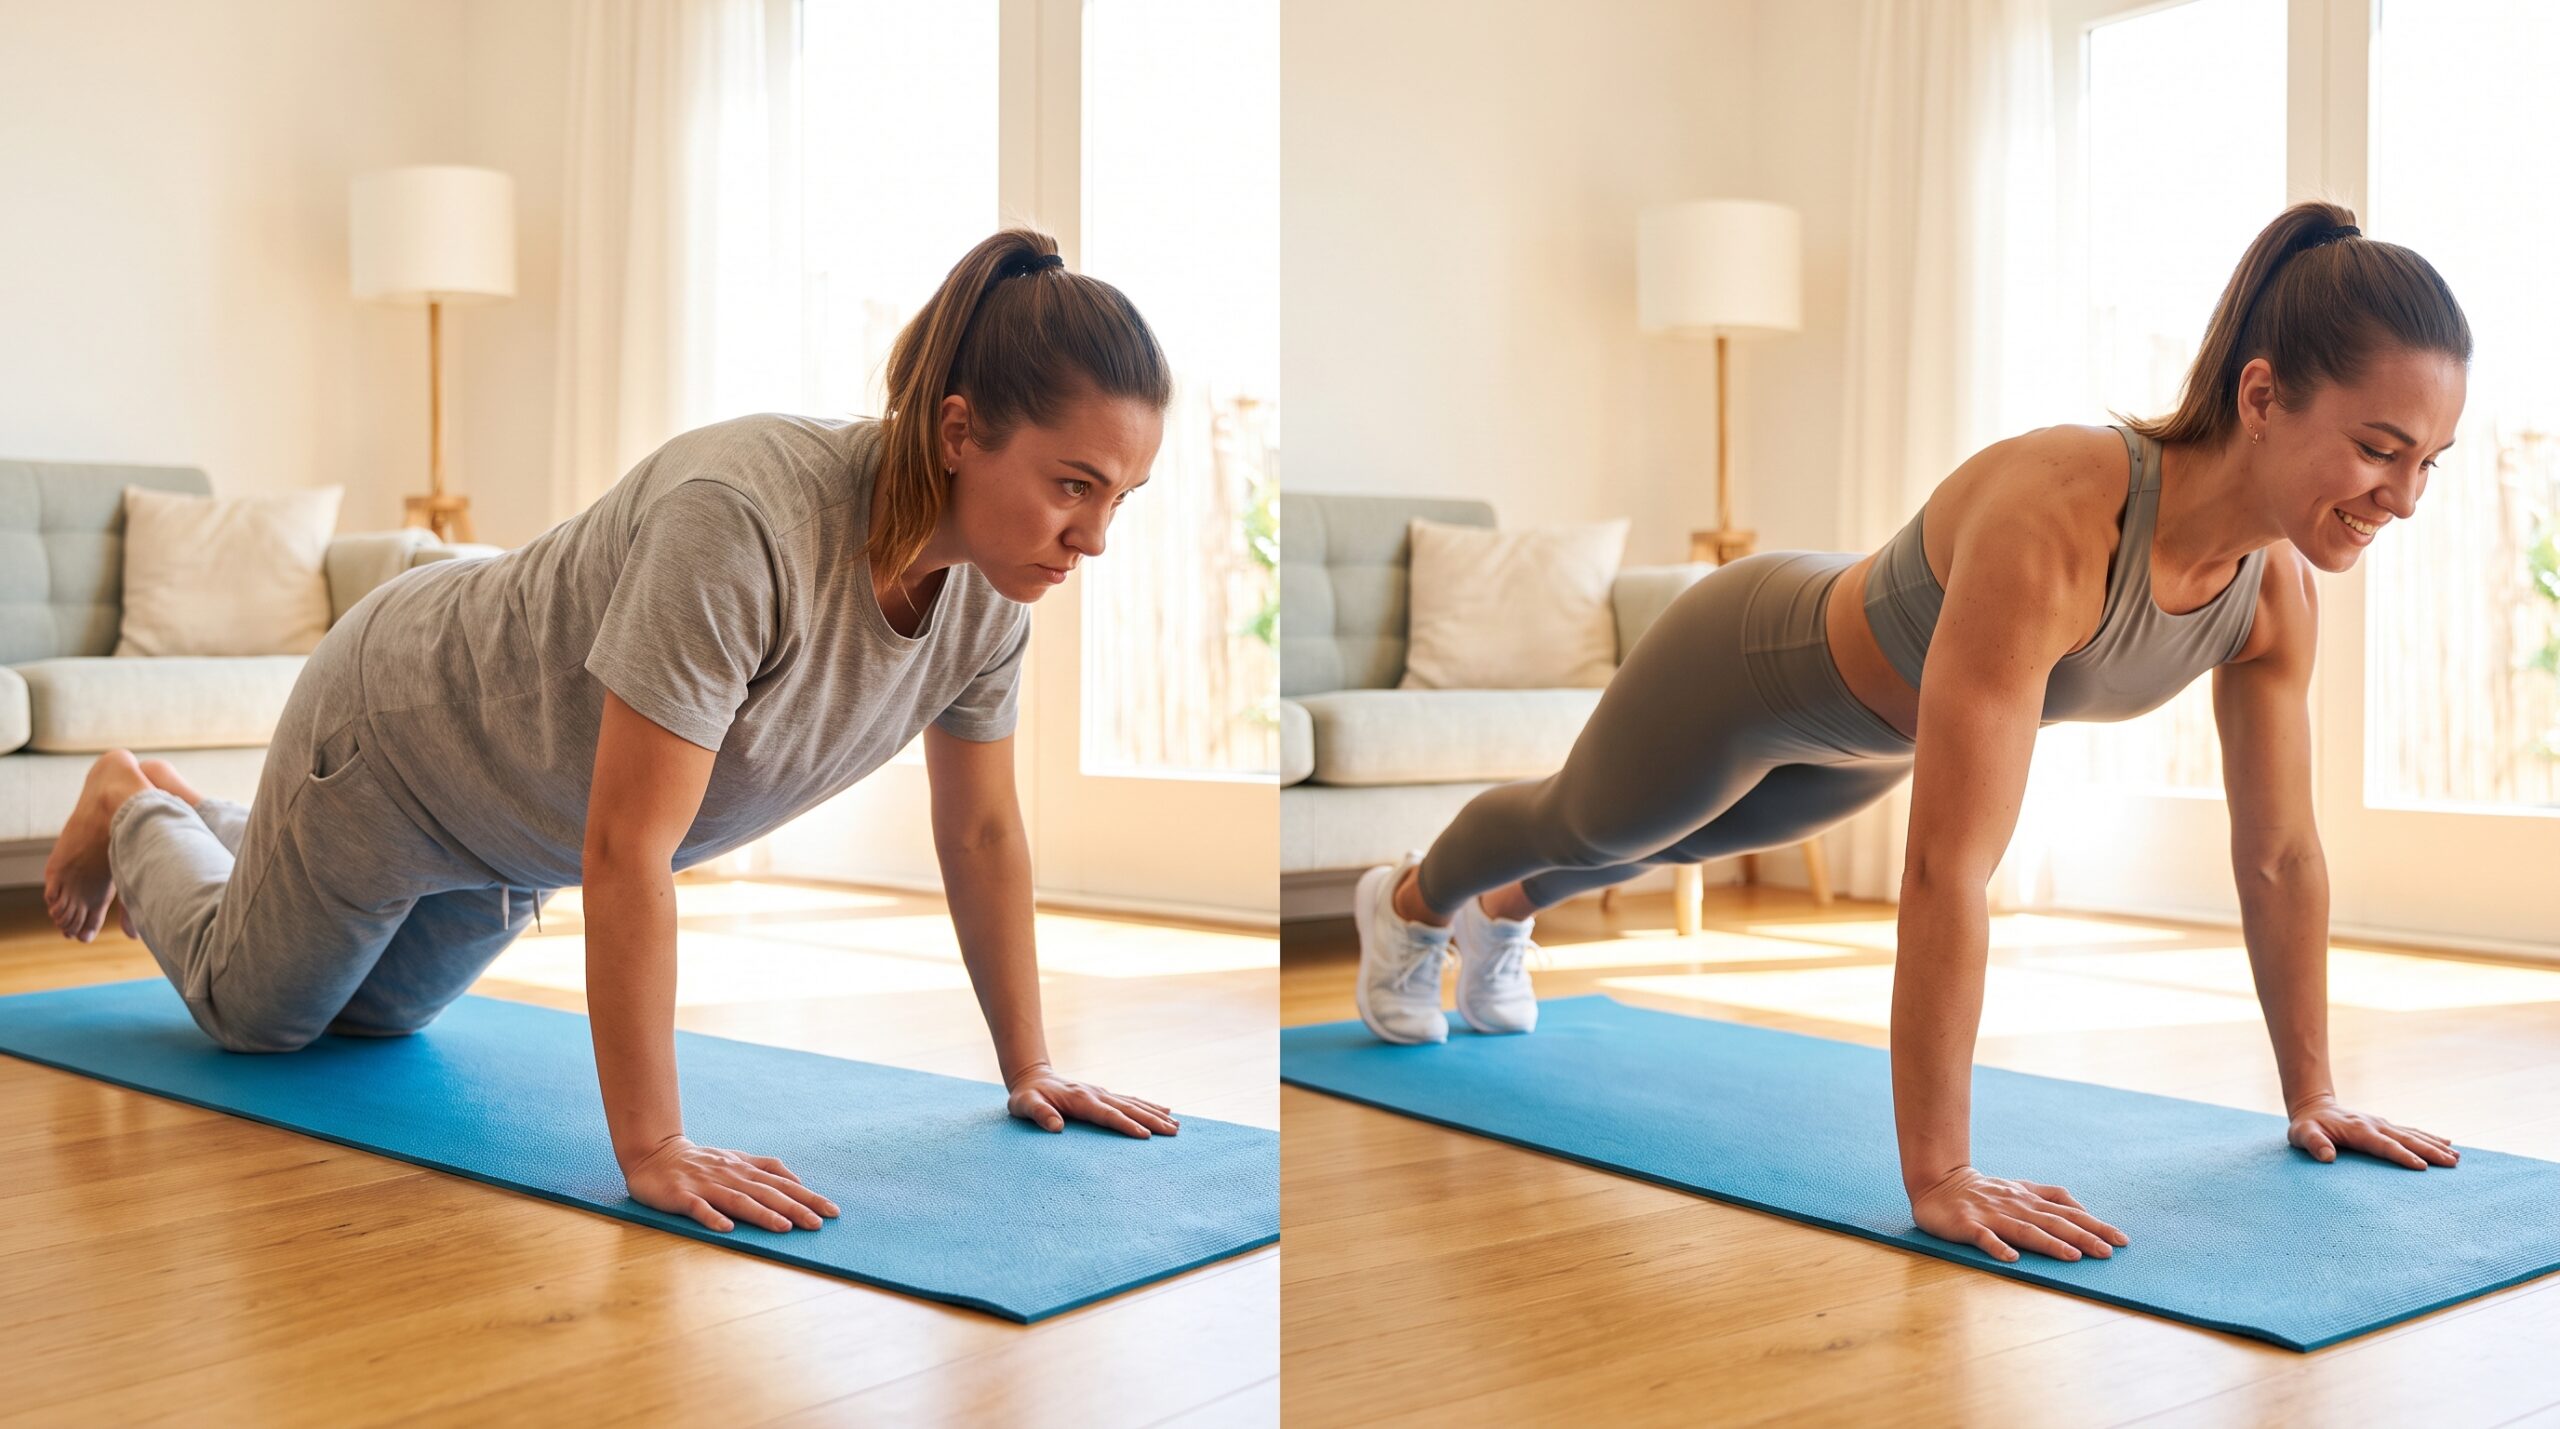
Woman performing a bodyweight push-up exercise at home on a yoga mat

You do not need a gym membership to lose fat. You do not need expensive equipment, a personal trainer, or a dedicated workout space. What you need is your own body, a few square feet of floor, and the right exercises done with enough consistency and intensity to actually produce results.

Done correctly, bodyweight exercises for fat loss are brutally effective. They challenge multiple muscle groups simultaneously, spike your heart rate, and create the kind of metabolic demand that keeps your body burning calories long after the workout ends. No barbells required. Here are the best ones, explained properly, not just listed.

Why Bodyweight Training Burns Fat So Effectively

The key is compound movement. Unlike isolation exercises, a bicep curl, a leg extension, bodyweight exercises almost always involve multiple muscle groups working together at the same time. A burpee works your legs, core, chest, shoulders and cardiovascular system simultaneously. That demands significantly more energy than any single muscle movement.

More muscle recruited means more calories burned, both during the exercise and afterward, through the elevated metabolic rate that follows intense effort. This post-exercise calorie burn, known as excess post-exercise oxygen consumption or EPOC, is particularly pronounced after high intensity bodyweight circuits.

You can make any bodyweight exercise harder or easier by adjusting the tempo, reducing rest, or combining exercises back to back. This keeps the training stimulus fresh and prevents the adaptation plateau that causes fat loss to stall.

The 7 Best Bodyweight Exercises

1
Burpees
QuadricepsHamstringsGlutesChestShouldersCoreCardio
30 to 45 sec work
15 to 20 sec rest, x4 to 6

If there is one bodyweight exercise that delivers the most fat-burning effect in the shortest time, the burpee is the strongest candidate. Start standing. Drop your hands to the floor, jump or step your feet back into a plank position, perform a push-up, jump your feet back toward your hands, and explode upward into a jump with arms overhead. That is one rep.

The reason burpees are so effective for fat loss is the full body demand they create. Your lower body powers the jumps, your upper body handles the push-up, and your core stabilizes the transition between positions. No other single exercise hits this many systems at once.

Beginner modification

Remove the jump and the push-up. Step back instead of jumping, hold the plank briefly, then step forward and stand. Build toward the full movement progressively.

2
Jump Squats
QuadricepsGlutesHamstringsCalvesCore
3 to 4 sets of 15 to 20
30 to 40 sec rest

The squat is already one of the best exercises in existence. Add an explosive jump and it becomes a fat-burning machine. Stand with feet shoulder-width apart. Lower into a squat until your thighs are roughly parallel to the floor, then drive through your heels and explode upward into a jump. Land softly with knees slightly bent and immediately lower into the next squat without pausing.

The explosive component recruits fast-twitch muscle fibres, the ones that generate the most power and demand the most energy, and elevates your heart rate rapidly. The continuous transition from squat to jump to squat creates a sustained cardiovascular demand that a regular squat simply does not match.

Knee-friendly modification

Remove the jump and increase the squat tempo instead, taking 3 full seconds to lower down and 1 second to stand. The slower eccentric phase significantly increases difficulty without impact.

3
Push-Up Variations
ChestFront DeltsTricepsSerratusCore
10 plus 10 reps, x3
30 sec rest

The standard push-up is already a solid exercise, but for fat loss specifically, push-up variations that increase intensity are where the real value lies. Wide-grip push-ups place greater emphasis on the chest and increase range of motion. Close-grip push-ups shift more demand to the triceps and create a greater core stability challenge. Explosive push-ups, where your hands leave the floor briefly, recruit fast-twitch fibres and dramatically increase cardiovascular demand.

For a fat-loss circuit, combine two variations back to back without rest between them. Do 10 standard push-ups immediately followed by 10 close-grip push-ups, rest 30 seconds, and repeat three times.

Beginner modification

Perform with knees on the floor to reduce the load while your upper body strength builds.

4
Mountain Climbers
AbsObliquesHip FlexorsShouldersQuads
40 to 45 sec work
15 to 20 sec rest

Mountain climbers are one of the most efficient fat-loss exercises because they function simultaneously as a core strengthener and a cardiovascular challenge. Start in a straight-arm plank with hands directly under shoulders. Drive one knee toward your chest, then rapidly switch legs in a running motion, keeping your hips low and your core firmly braced throughout.

At maximum speed, mountain climbers produce a cardiovascular response comparable to sprinting, while also building significant core strength and hip flexor endurance. Include them in circuits between strength-focused movements like squats and push-ups to keep your heart rate elevated throughout the session.

5
Reverse Lunges With Knee Drive
QuadricepsGlutesHamstringsHip FlexorsBalance
12 to 15 reps per leg, x3

A standard reverse lunge is already an excellent lower body exercise. Adding a knee drive at the top transforms it into a balance, strength and conditioning movement that burns significantly more calories per rep. Step one foot back into a reverse lunge, lowering your back knee toward the floor. As you drive back up through your front heel, drive your back knee forward and upward toward your chest in a controlled motion before stepping back into the next lunge.

This addition challenges your balance, engages your core to prevent rotation, activates your hip flexors in the drive phase, and briefly elevates your heart rate with each rep.

6
Plank to Downward Dog
AbsShouldersLatsHamstringsCalves
3 sets of 12 to 15
30 sec rest

This movement is less commonly included in fat-loss routines, but it deserves a place in every bodyweight program. Start in a forearm plank position. Press up onto your hands and immediately push your hips up and back into a downward dog position, forming an inverted V shape with your body, heels pressing toward the floor. Hold briefly, then return to the plank. That is one rep.

The constant transition forces your core, shoulders and posterior chain to work dynamically rather than statically. It also stretches and strengthens simultaneously, your hamstrings and calves lengthen in the downward dog phase while your shoulders and core stay under load throughout.

7
High Knees
Hip FlexorsQuadricepsHamstringsCalvesCardio
30 to 40 sec bursts

High knees are essentially running on the spot, but with exaggerated knee lift and deliberate arm drive, they become significantly more demanding than they appear. Stand with feet hip-width apart. Drive your right knee up toward your chest while simultaneously pumping your left arm forward, then switch rapidly, left knee up, right arm forward, maintaining a quick, continuous rhythm.

High knees are ideal as a warm-up movement, as a finisher at the end of a circuit, or as an active recovery movement between more intense exercises.

How to Build a Fat-Loss Bodyweight Circuit

Individual exercises are valuable, but for maximum fat-burning effect, combine them into circuits, sequences of exercises performed back to back with minimal rest between movements and a short rest between rounds. Here is a sample circuit using the exercises above:

Sample Fat-Loss Circuit
Repeat the full round 3 to 4 times
  • 35s
    Burpees
    Work interval
  • 15s
    Rest
    Recovery
  • 40s
    Jump Squats
    Work interval
  • 15s
    Rest
    Recovery
  • 40s
    Mountain Climbers
    Work interval
  • 15s
    Rest
    Recovery
  • 35s
    Push-Up Variation
    Work interval
  • 15s
    Rest
    Recovery
  • 40s
    High Knees
    Work interval
  • 60 to
    90s
    Rest Before Next Round
    Longer recovery

This circuit challenges your cardiovascular system, works every major muscle group, and creates the kind of sustained metabolic demand that drives meaningful fat loss over consistent weeks of training.

How Often Should You Train

Three to four sessions per week is the ideal frequency for most people pursuing fat loss with bodyweight training. This provides enough training stimulus to drive adaptation and calorie expenditure while allowing adequate recovery between sessions. Training every day without rest significantly increases injury risk, slows recovery, and often produces diminishing returns rather than faster results.

On rest days, light movement such as walking, stretching or gentle yoga keeps circulation and mobility going without interfering with recovery.

Progression: How to Keep Getting Results

Bodyweight exercises for fat loss stop producing results when they stop being challenging. Your body adapts to familiar demands remarkably quickly, particularly in the first few weeks of training. Progress consistently by:

  • Reducing rest periods between exercises and rounds
  • Increasing work intervals from 35 seconds to 40, then 45 seconds
  • Adding a third or fourth round to sessions that previously used two
  • Slowing the tempo of strength movements to increase time under tension
  • Combining exercises, for example adding a push-up at the bottom of each burpee

Your Bodyweight Fat-Loss Quick Start Checklist

  • Pick 4 to 5 exercises and build them into a circuit
  • Train 3 to 4 times a week with rest days between
  • Keep work intervals high intensity, rest intervals short
  • Progress weekly by reducing rest or adding rounds
  • Use the modifications if a movement feels too advanced at first

Final Thoughts

The best bodyweight exercises for fat loss are not the flashiest or the most complicated. They are the ones that demand the most from your body, engaging multiple muscle groups, spiking your heart rate, and creating a metabolic response that extends beyond the workout itself.

Burpees, jump squats, mountain climbers, explosive push-ups, reverse lunges, these are not beginner exercises to graduate away from. They are legitimate tools that can be made as easy or as challenging as your current fitness level demands, and they produce real, measurable fat loss when used consistently.

No gym. No excuses. Just effort, consistency and results.

Benefits of Drinking Water for Weight Loss

Benefits of Drinking Water for Weight Loss

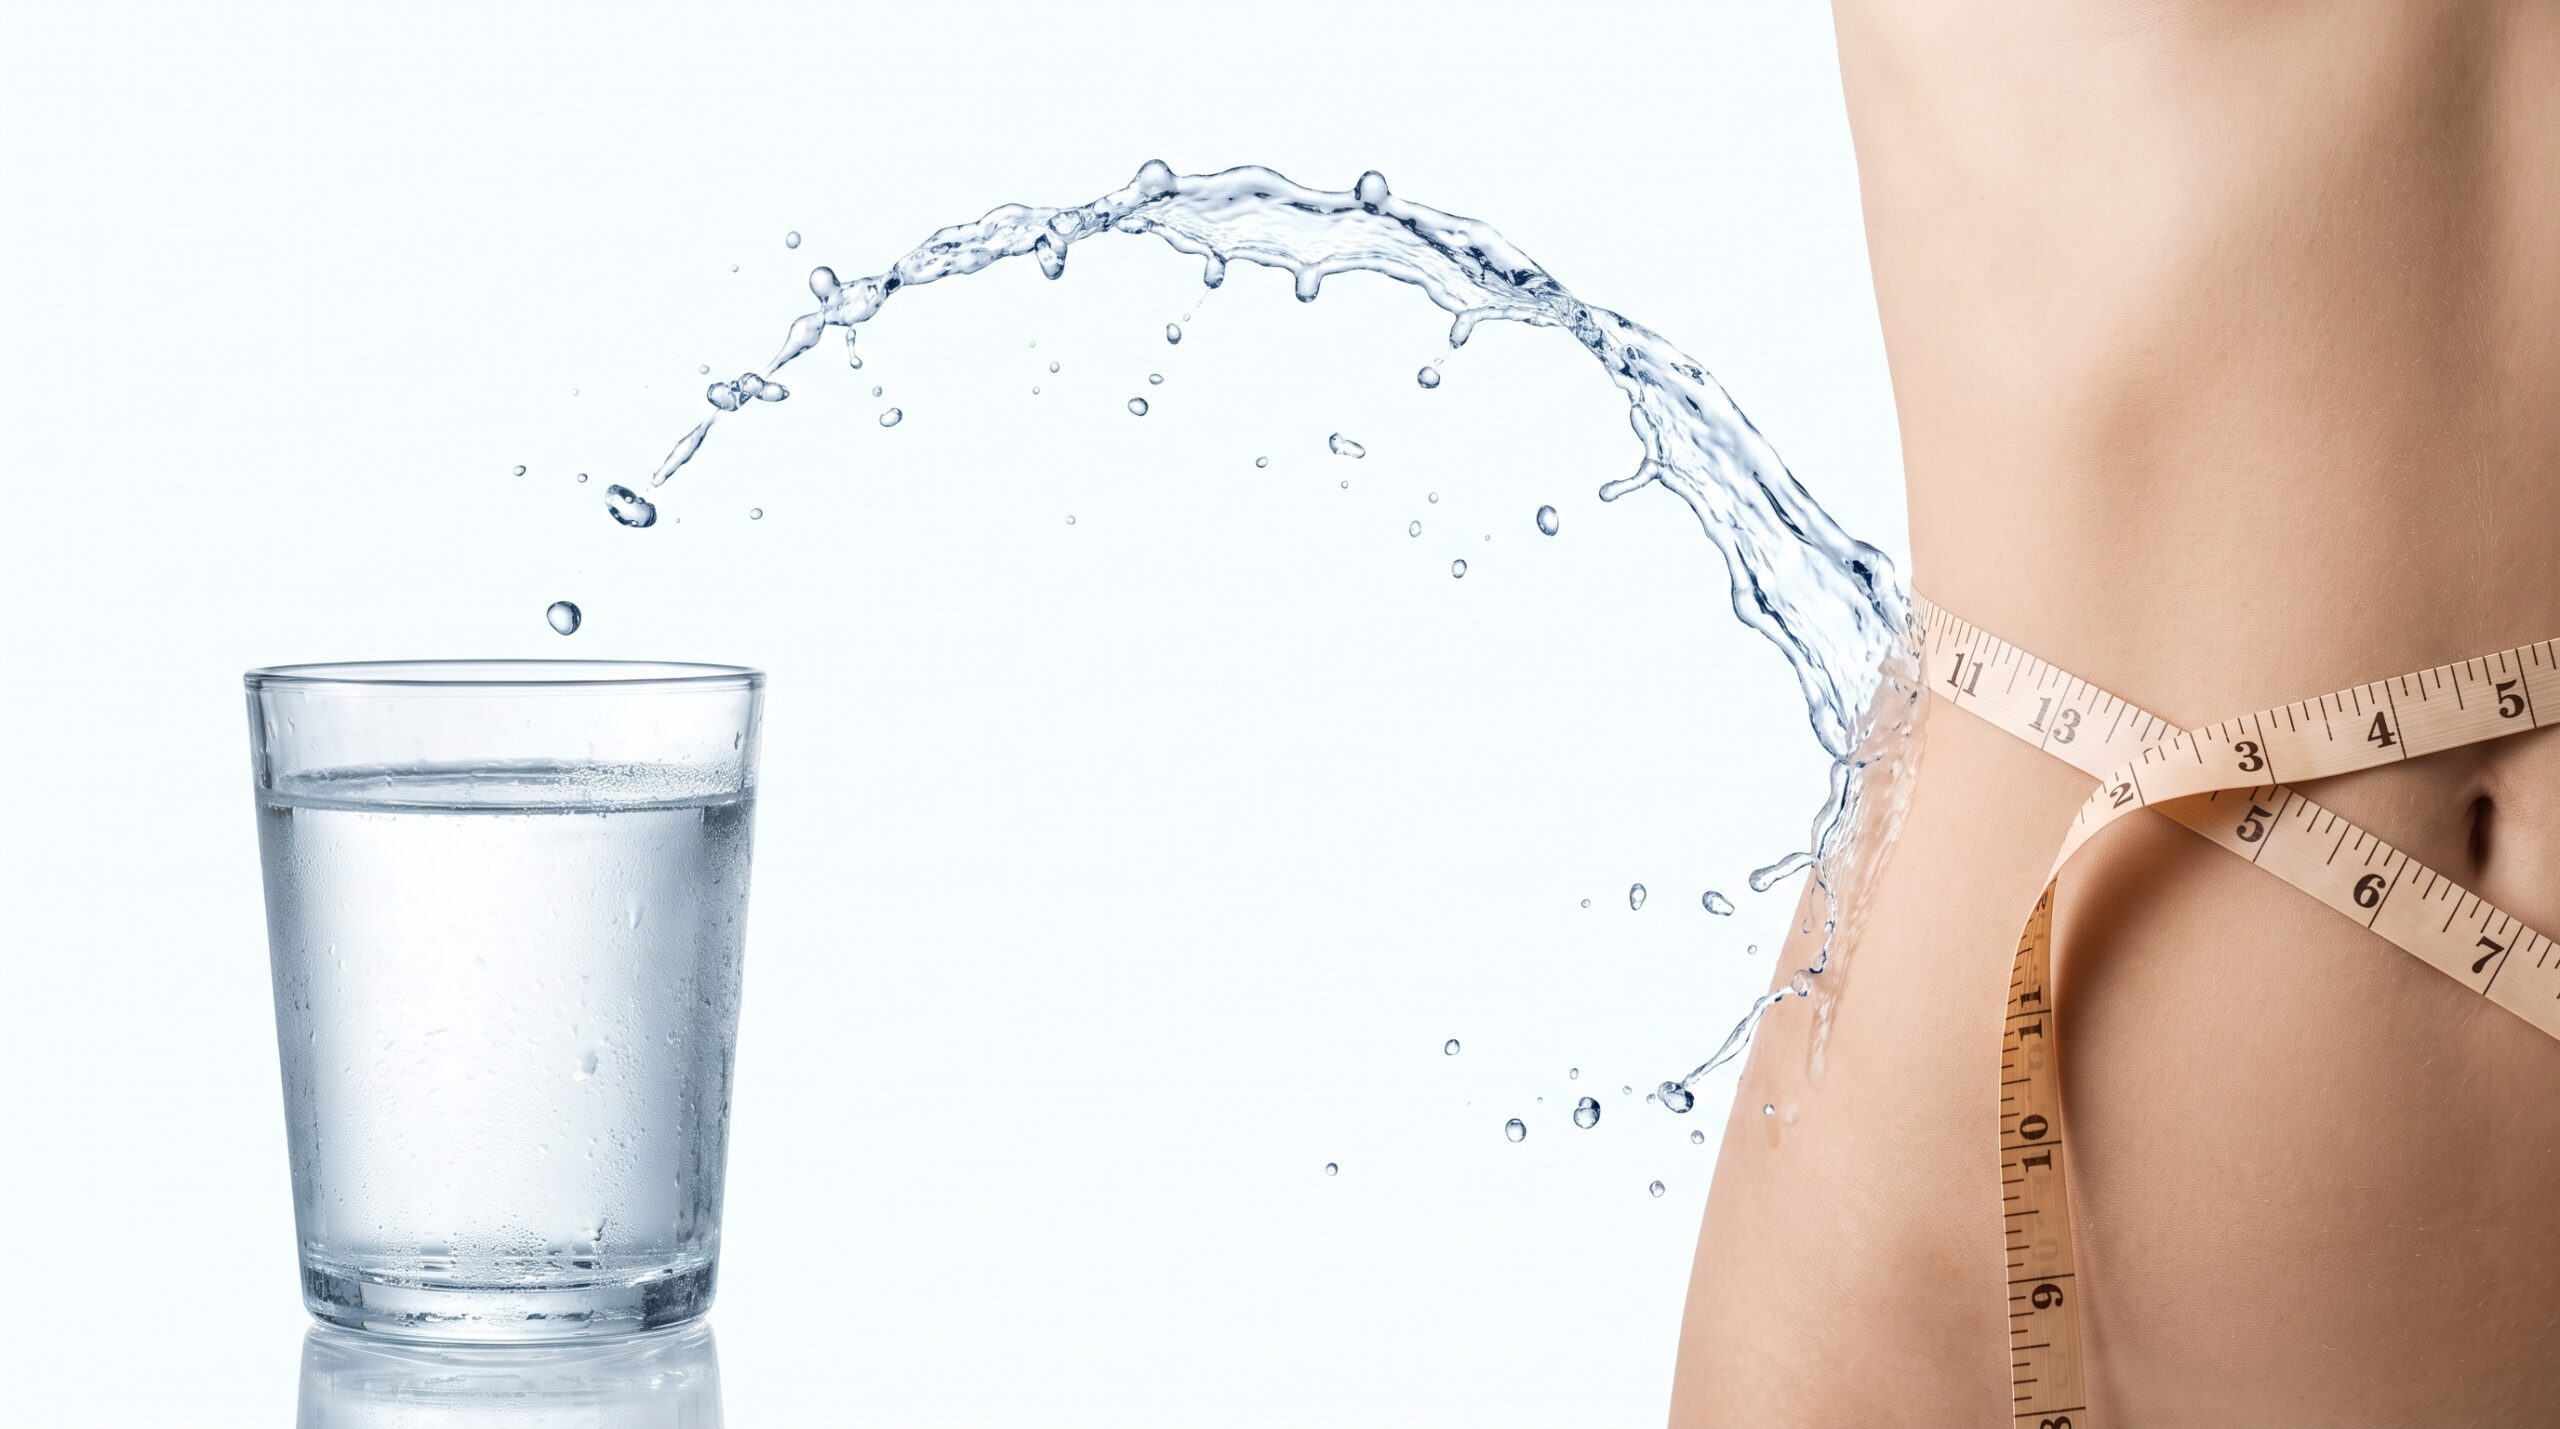
Glass of water splashing toward a woman measuring her waistline with a tape measure

You are doing everything right. You are watching what you eat, cutting back on the obvious things, trying to move more. But the scale is not cooperating the way you expected, and you cannot figure out what you are missing.

Here is a question worth asking: are you drinking enough water? It sounds almost too simple, but the research on this is surprisingly strong, and the mechanism is not mysterious at all once you understand what water actually does inside your body throughout the day.

0 Calories
Every single glass
24 to 30%
Metabolism boost
500ml
30 min before meals
2.5 to 3.5L
Daily target

Water Has Zero Calories, But Does Far More0 kcal per glass

The most obvious benefit of water for weight loss is the one most people already know: it has absolutely no calories. But that alone understates how powerful it actually is.

When you replace calorie-containing drinks such as sodas, packaged juices, sweetened teas and energy drinks with water, you create an immediate caloric deficit without changing a single thing about your food. A standard can of soda contains roughly 140 calories, and a packaged fruit juice can hold 120 calories or more. Two of those per day adds up to nearly 3,000 extra calories per week, almost entirely liquid calories that do nothing to make you feel full.

Switch those out for water consistently, and you have created a meaningful calorie reduction without any willpower around food. That is the first and most straightforward way drinking water for weight loss actually works.

Water Before Meals Reduces How Much You Eat12-week study

Your stomach has physical limits. When there is already volume inside it, the stretch receptors in the stomach wall send satiety signals to your brain faster than they would with an empty stomach. Drinking water before a meal pre-loads your stomach with volume, which means you feel full sooner during the meal itself.

A well-designed study published in the journal Obesity found that adults who drank 500 milliliters of water approximately 30 minutes before each main meal lost significantly more weight over 12 weeks compared to those who did not. They were not dieting more aggressively, they were simply drinking water before eating.

The practical application is straightforward. Drink a full glass of water 20 to 30 minutes before breakfast, lunch and dinner. That single habit, maintained consistently, reduces your total daily calorie intake without any sense of deprivation.

Water Temporarily Boosts Your Metabolism40 to 60 min effect

This is the benefit most people have never heard of, and it is genuinely impressive. Several studies have shown that drinking approximately 500 milliliters of water increases metabolic rate by 24 to 30 percent for about 40 to 60 minutes afterward. This effect is called water induced thermogenesis, your body uses energy to warm the water to body temperature after you drink it, which briefly elevates calorie burning.

This might sound like a small effect, but consider the math: drink 500ml of cold water four times throughout the day, and you generate four brief metabolic boosts. Over weeks and months of consistent hydration, this adds up to a meaningful additional calorie expenditure, without a single extra minute of exercise.

Cold water produces a slightly stronger thermogenic effect than room temperature water because the body has to work harder to bring the temperature up. This does not mean you need to drink ice cold water exclusively, the difference is small, but it is worth knowing.

Dehydration Mimics Hunger and Triggers Eating10 minute rule

This is one of the most underappreciated reasons people overeat, and it directly connects to weight loss. Your brain processes the signals for thirst and hunger in the same region, the hypothalamus. When you are mildly dehydrated, the signals your brain generates can be interpreted as hunger rather than thirst. The result: you eat when your body actually just needed water.

Think about how often you feel a vague craving mid afternoon, not really hungry, but wanting something. That feeling very frequently turns out to be mild dehydration. Drinking a full glass of water and waiting 10 to 15 minutes will often make the craving disappear entirely.

A simple rule that works: whenever you feel an unexpected craving between meals, drink a glass of water first and wait 10 minutes. If the craving is still genuinely there, then eat. A surprising percentage of between-meal cravings simply vanish.

Water Supports Fat Burning at a Cellular LevelHydrolysis

When you are trying to lose weight, your body needs to break down stored fat and convert it into usable energy. This process, called lipolysis, requires water to work properly. The first step of fat metabolism involves a chemical reaction called hydrolysis, where water molecules interact with fat molecules to begin breaking them down. Without adequate water, this process slows. In simple terms, you cannot efficiently burn fat if you are chronically dehydrated.

This is not a dramatic effect that you will feel minute to minute. But it is a consistent, background influence on how effectively your body uses stored fat as fuel. Staying well hydrated keeps the fat burning machinery running at full capacity rather than operating at a deficit.

Water Eliminates Bloating and Water RetentionA few days

Here is one that surprises most people because it seems counterintuitive: drinking more water actually reduces water retention. When your body is chronically under-hydrated, it treats this as a scarcity signal. In response, it holds onto every bit of water it has, storing it in the tissues beneath your skin. This is what causes that puffy, bloated feeling, particularly around the stomach, face and hands, that makes you look and feel heavier than you actually are.

When you start drinking consistently adequate water, your body receives the opposite signal: abundance, not scarcity. It stops hoarding water in the tissues and flushes the excess out through urine. Many people who start drinking enough water notice a visible reduction in bloating within just a few days. The number on the scale can also drop noticeably, not because fat was lost, but because retained water was released.

This also has a significant impact on how you feel day to day. Chronic bloating is uncomfortable and discouraging. Eliminating it makes you feel lighter, more energized and more motivated, all of which support the consistency that weight loss requires.

Water Supports Exercise Performance1 to 2% dehydration hurts

If exercise is part of your weight loss strategy, and it should be even in small amounts, water directly affects how well that exercise goes. Even mild dehydration of just one to two percent of body weight noticeably reduces physical performance. Your cardiovascular system has to work harder, your muscles receive less oxygen, and fatigue sets in earlier. A workout done in a mildly dehydrated state burns fewer calories, feels significantly harder, and takes longer to recover from.

On the other hand, being well hydrated before, during and after exercise means you perform closer to your actual capacity. You can work harder, last longer, and recover faster. Over weeks and months, this compounds into meaningfully better fitness results and greater total calorie expenditure.

Think of hydration as the invisible foundation that makes every workout more effective. It does not get the credit, but it is doing significant work.

Practical Ways to Use Water for Weight Loss

Knowing the benefits is one thing. Actually drinking enough water consistently is another challenge entirely. Here is what works:

01

Start Your Morning Right

Drink a large glass of water first thing every morning, before coffee, before food, before your phone. Your body is mildly dehydrated after sleep, and this immediately corrects that.

02

Drink Before Meals

500ml of water 30 minutes before each main meal specifically helps reduce meal time portions and total calorie intake.

03

Carry a Water Bottle

A one liter bottle everywhere you go. When water is visible, you drink it. When it is out of sight, you forget.

04

Set Hourly Reminders

A gentle hourly nudge on your phone adds up to consistent hydration throughout the day without you having to think about it.

05

Water Before Cravings

Drink a glass of water whenever a craving strikes and wait 10 minutes before deciding whether to eat.

06

Add Natural Flavor

Sliced lemon, cucumber, fresh mint or a few strawberries make water significantly more enjoyable without adding meaningful calories.

07

Eat Water-Rich Foods

Cucumber, watermelon, tomatoes, leafy greens and oranges all contribute to your daily hydration while providing fiber and nutrients.

How Much Water for Weight Loss Specifically

The general formula works here too: 35 milliliters per kilogram of body weight per day as your baseline, adjusted upward for exercise and hot weather. For weight loss purposes specifically, aim for the higher end of your personal range. The benefits, appetite suppression, fat metabolism, reduced bloating and metabolic boost, all become more pronounced when you are genuinely well hydrated rather than just hovering around the minimum.

2.5 to 3.5 Liters
A practical daily target for most adults pursuing weight loss, adjusted for your size and activity level

Your Water for Weight Loss Quick Start Checklist

  • Swap sugary drinks for water to cut calories instantly
  • Drink 500ml about 30 minutes before every main meal
  • Try water first when a craving hits, then wait 10 minutes
  • Stay hydrated before, during and after every workout
  • Aim for 2.5 to 3.5 liters daily, adjusted to your size and activity

Final Thoughts

Drinking water for weight loss is not a gimmick or a shortcut. It is a legitimate, well researched strategy that works through multiple pathways simultaneously, reducing calorie intake, suppressing appetite, boosting metabolism, supporting fat burning, and eliminating bloating.

None of these effects are dramatic on their own. But combined and consistent over weeks and months, they create a meaningful advantage that supports everything else you are doing. And it costs nothing, requires no preparation, has no side effects, and works from the very first glass.

Start with one full glass of water right now, before your next meal, before your next snack, before anything else. That is the beginning of a habit that compounds into real results.

How Much Water Should You Drink Daily for Fitness?

How Much Water Should You Drink Daily for Fitness?

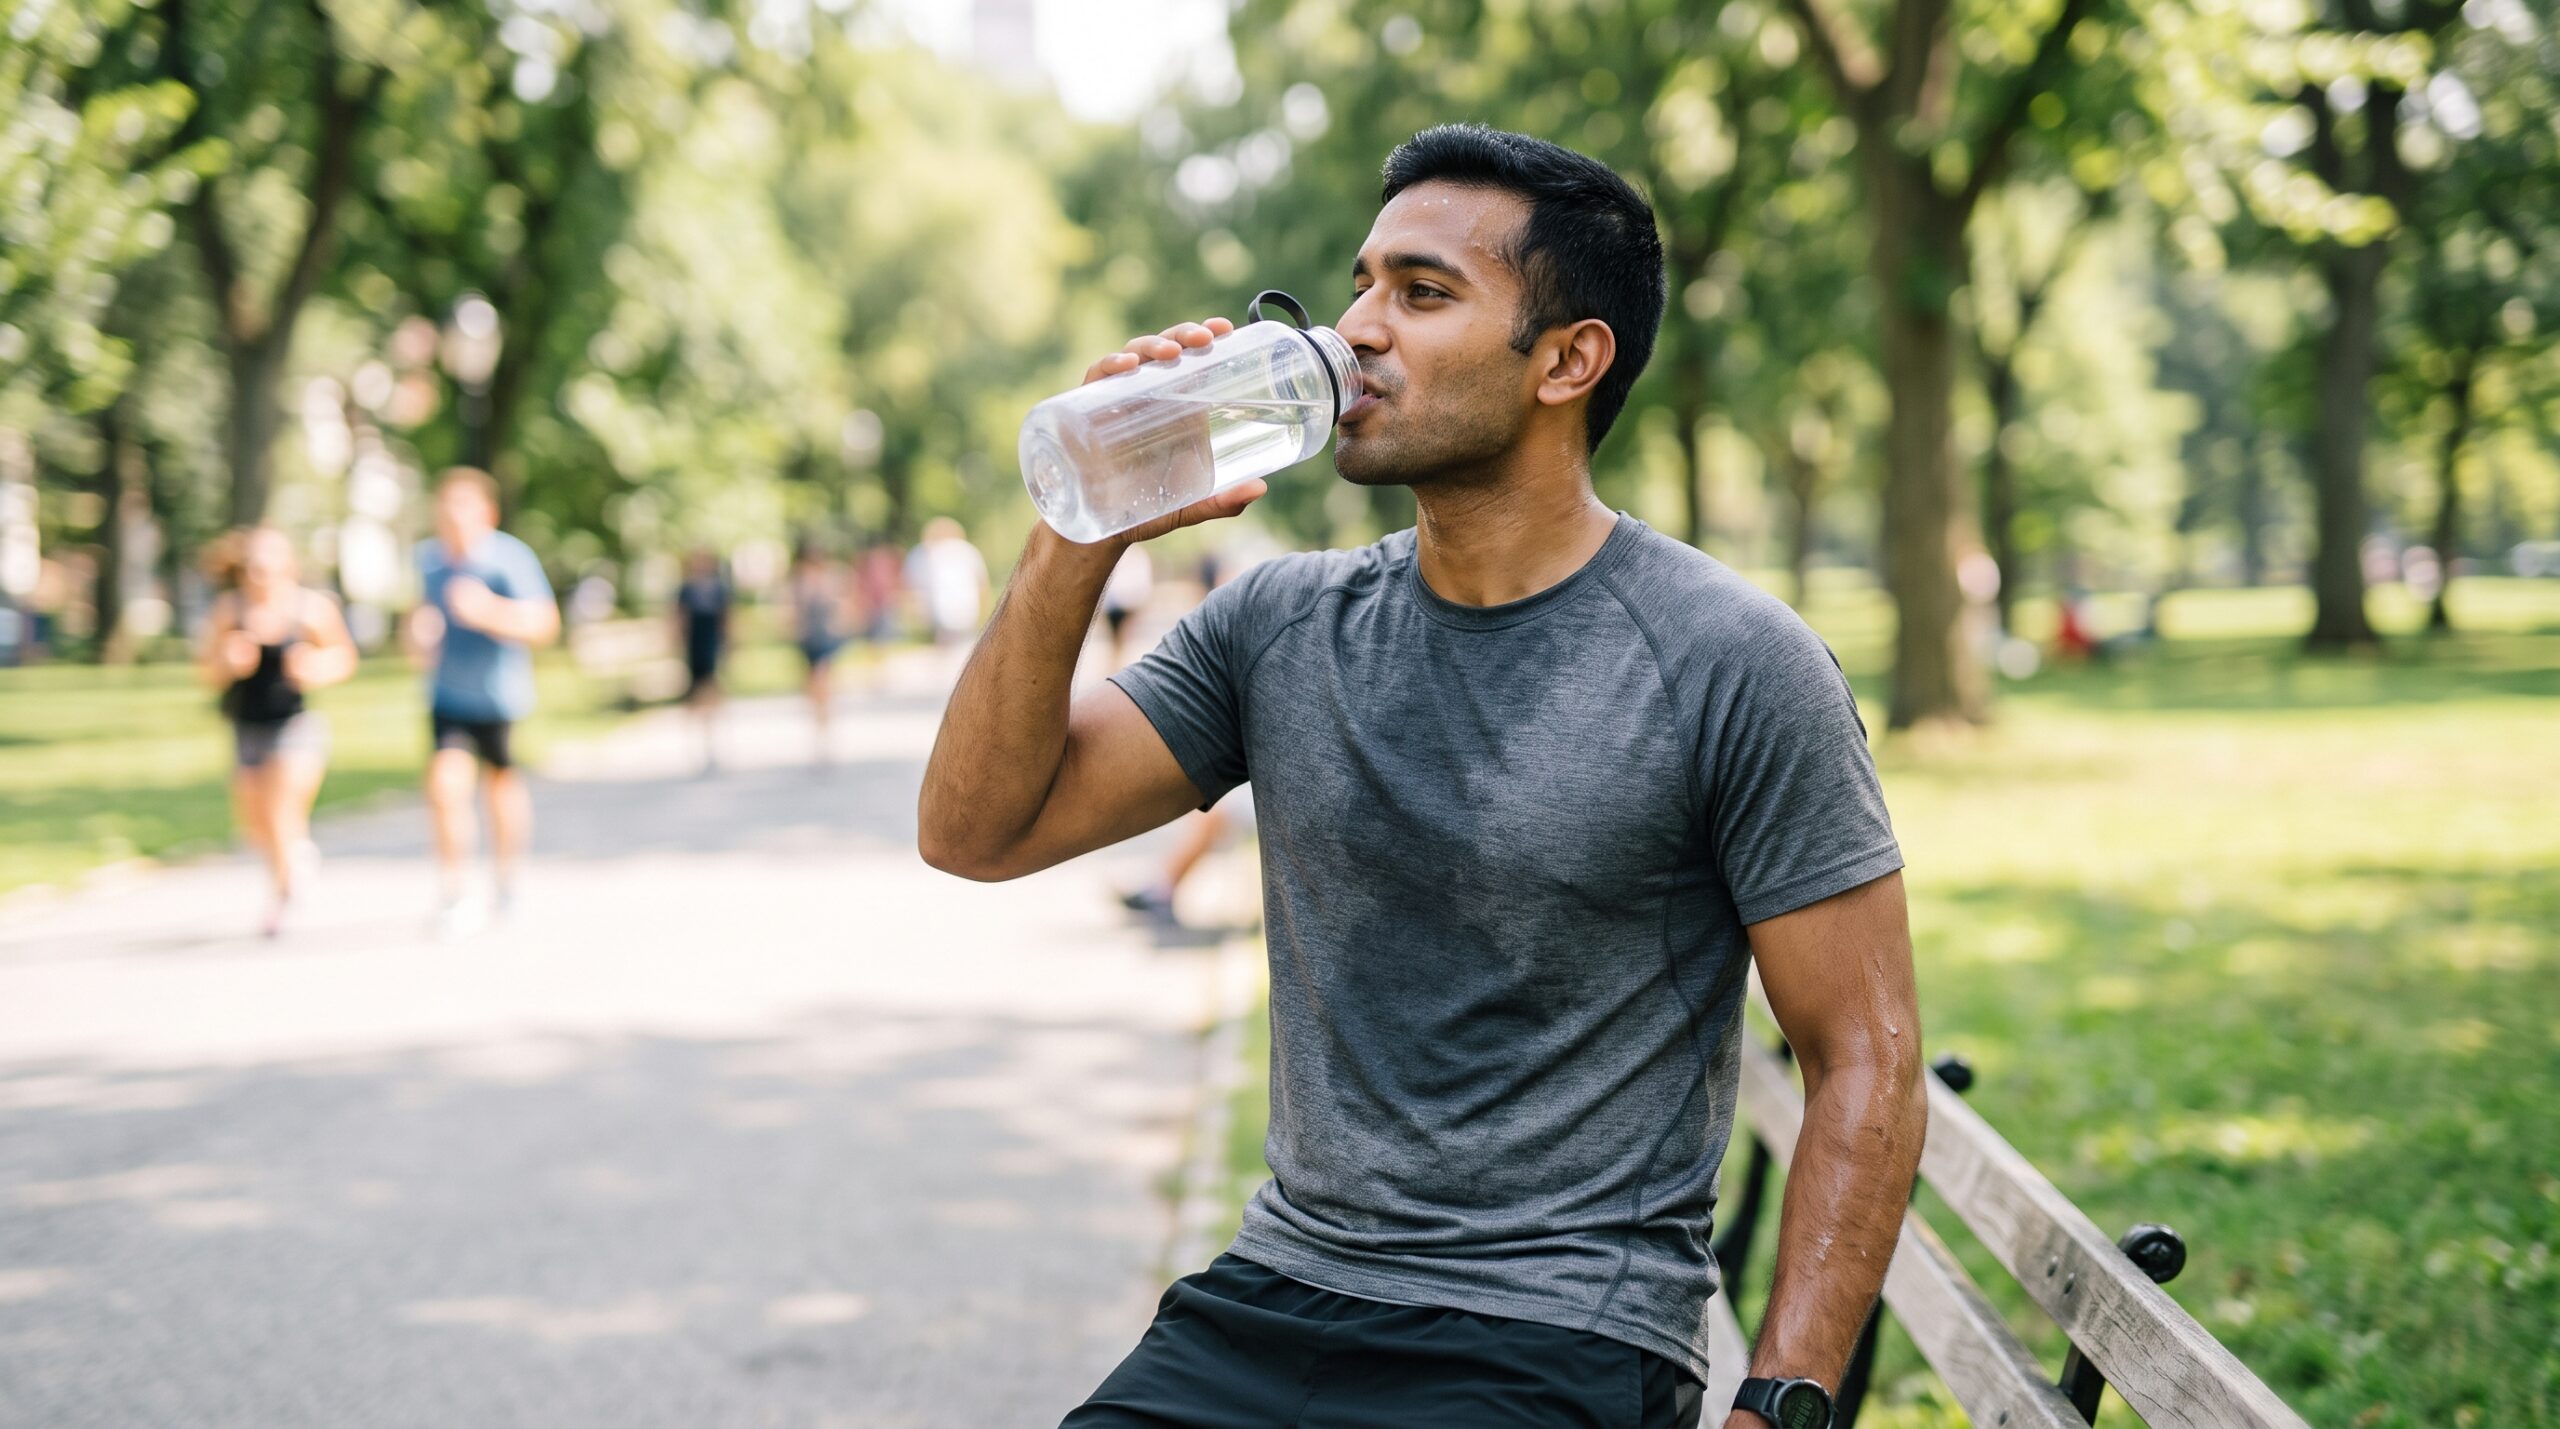
Man drinking water from a bottle after a workout in the park

You are tired. Your head feels foggy. Your workout felt harder than usual, and you have no idea why. Before you blame your schedule, your stress, or your sleep quality, when did you last drink a proper glass of water?

Dehydration is one of the most common and most overlooked reasons people feel flat, sluggish and underperforming. So how much water should you actually drink every day? The answer is more nuanced than the famous "eight glasses a day" advice most people have heard since childhood. Let us get into the real numbers, the real science and the real strategy.

Why Water Matters More Than Most People Think

Your body is approximately 60 percent water. Every single system that keeps you alive and functioning depends on it. Water transports nutrients to your cells and carries waste products away. It regulates your body temperature through sweat, cushions your joints, and supports kidney function, digestion and even the production of hormones. Your brain is roughly 75 percent water, which explains why even mild dehydration impairs concentration, decision making and mood.

For fitness specifically, water plays an even more direct role. During exercise, your muscles generate heat and your body responds by producing sweat to cool you down. Lose enough of it without replacing it, and your cardiovascular system has to work harder to pump blood, your muscles receive less oxygen, and your performance drops noticeably.

Studies have shown that being just 2 percent dehydrated reduces aerobic performance by up to 10 percent and strength output by 5 to 8 percent. You can reach that threshold after a moderately intense 60 minute workout in warm conditions without drinking anything. Water is not a supplement. It is the foundation everything else is built on.

How Much Water Should You Drink Daily

The "eight glasses a day" rule is a reasonable starting point, but it is not personalized to your body, your activity level or your climate. A more accurate starting point is based on body weight: drink approximately 35 milliliters of water per kilogram of body weight per day.

So for a 70 kilogram person, that works out to roughly 2,450 milliliters, about 2.4 liters or just over 10 standard glasses per day. For a 60 kilogram person, the calculation gives approximately 2.1 liters. This baseline then needs to be adjusted upward based on your activity level:

  • Light exercise, 30 minutes: Add 350 to 500ml
  • Moderate exercise, 45 to 60 minutes: Add 500 to 750ml
  • Intense or prolonged exercise, 60 minutes or more: Add 750ml to 1 liter or more
  • Hot climate or significant sweating: Add an additional 500ml on top of the above

So if you are a 70 kilogram person doing a 45 minute workout in warm weather, your daily target could easily reach 3 to 3.5 liters.

How to Know If You Are Drinking Enough

The most practical and reliable way to check your hydration status costs nothing and requires no equipment. Look at the color of your urine. This is not glamorous advice, but it works.

  • Pale yellow, like lemonade: well hydrated, this is your target
  • Clear: possibly slightly over-hydrated, rarely a serious problem but you can ease off a little
  • Dark yellow, like apple juice: mildly dehydrated, drink water now
  • Amber or orange: significantly dehydrated, this needs immediate attention
  • Brown: severely dehydrated or potentially a sign of a medical issue, seek help

Check this first thing in the morning. Morning urine is naturally more concentrated, but if it is consistently very dark, your overall daily intake is too low. Other signs of insufficient hydration include persistent headaches, difficulty concentrating, low energy in the afternoon, dry lips, and feeling hungry when you have eaten recently.

When Should You Drink Water Throughout the Day

Timing your water intake strategically makes a real difference, both for hydration and for fitness goals.

First Thing in the Morning

Start with a large glass of water before coffee, before breakfast, before your phone. This kickstarts metabolism and rehydrates tissues after sleep.

Before Meals

Drinking 350 to 500ml of water 20 to 30 minutes before eating reduces meal time hunger and helps with portion control without affecting your enjoyment of the meal.

Before, During and After Exercise

  • Drink 400 to 600ml in the 2 hours before a workout
  • Sip 150 to 250ml every 15 to 20 minutes during exercise
  • Drink 500ml after your workout to replace what was lost

Mid Afternoon and Before Bed

Before reaching for coffee or a snack during your energy dip, drink a full glass of water. A small glass before sleep is fine, but avoid a large amount that could disrupt your sleep.

Does Coffee, Tea or Other Drinks Count

Yes, caffeinated drinks like coffee and tea do count toward your hydration, contrary to what was previously believed. More recent research has shown that moderate caffeine consumption does not cause net fluid loss in regular coffee and tea drinkers whose bodies have adapted to it. However, there are some important distinctions:

  • Plain water is always the best hydration source, it has no additives, no calories and no variables
  • Coffee and tea count but should not replace water entirely, aim for water to make up the majority of your intake
  • Sparkling water counts fully, an excellent hydrating alternative if plain water feels boring
  • Milk and herbal teas count, both are good contributors to daily fluid intake
  • Sugary drinks do not count. Sodas, packaged juices and sweetened beverages may contain water, but the sugar counteracts the hydration benefit and adds unnecessary calories

Practical Tips to Drink More Water Every Day

Knowing how much water you need and actually drinking it are two different challenges. Here are strategies that genuinely work:

01

Carry a Reusable Bottle

When water is visible and accessible, you drink it. A one liter bottle refilled twice gives you your baseline without counting glasses.

02

Set Hourly Reminders

A gentle reminder every hour to take a few sips adds up significantly over the course of a day, especially if you get absorbed in work.

03

Drink Before Every Meal

A full glass before every meal and snack adds three to five glasses to your day without any deliberate effort.

04

Eat Water-Rich Foods

Cucumbers, watermelon, oranges, strawberries, tomatoes and leafy greens all have very high water content and add fiber and nutrients too.

05

Start With a Habit Stack

Place a glass of water on your bedside table the night before, and pair it with something you already do every morning to make it automatic.

06

Flavor Your Water

A slice of lemon, cucumber, mint leaves or a few berries in a jug of water make drinking it noticeably more enjoyable.

Can You Drink Too Much Water

Yes, though it is genuinely rare in everyday situations and much less common than under-hydration. Drinking an extreme excess of water in a short period can dilute the sodium levels in your blood, a condition called hyponatremia.

This is occasionally seen in endurance athletes who drink very large volumes of plain water over several hours without replacing electrolytes. For the average person following normal hydration guidelines, it is not a meaningful concern. If exercising intensely for more than 90 minutes, consider an electrolyte drink or a pinch of mineral salt in your water.

A Simple Daily Hydration Target to Start With

If calculating percentages feels overwhelming, use this as your starting framework:

Body WeightBaseline Daily WaterWith Exercise, 30 to 60 min
50 kg1.75 liters2.3 liters
60 kg2.1 liters2.7 liters
70 kg2.45 liters3.1 liters
80 kg2.8 liters3.5 liters
90 kg3.15 liters3.9 liters

Use this as a starting point. Adjust based on how your body feels, the color of your urine, and how active your day is. Your personal ideal may be slightly above or below these numbers, and that is completely normal.

Your Daily Hydration Quick Start Checklist

  • Calculate your baseline at 35ml per kilogram of body weight
  • Add 350ml to 1 liter more depending on exercise and heat
  • Start every morning with a large glass before anything else
  • Check your urine color, aim for pale yellow
  • Carry a bottle and sip through the day rather than waiting to feel thirsty

Final Thoughts

Water is the simplest, cheapest and most immediately effective tool available for improving how you feel, how you perform and how your body functions every single day. It costs nothing and requires no planning beyond basic consistency.

Work out your personal daily target using your body weight. Drink a glass first thing every morning. Carry a water bottle. Check the color of your urine.

Small, consistent habits around hydration will make every other healthy habit you practice more effective. Start today, one full glass, right now.

3 Healthy Chicken Karahi Recipes (Low Oil)

3 Healthy Chicken Karahi Recipes (Low Oil)

Healthy low oil chicken karahi served with roti and a woman cooking chicken karahi in a wok

Chicken karahi is one of those dishes that feels like home. The smell of tomatoes and ginger hitting a hot pan, the deep warmth of cumin and coriander, the way the masala clings to the chicken, there is really nothing quite like it.

But if you are trying to eat healthier, karahi can feel like the enemy. Here is the truth most people do not realize: the oil in karahi is largely optional. The flavour comes from the tomatoes, ginger, garlic and spices, not from a quarter cup of cooking oil. Here are three versions to prove it.

What Makes a Karahi Healthy Without Ruining the Taste

Traditional karahi uses anywhere from 4 to 6 tablespoons of oil per serving. These recipes use 1 to 2 tablespoons. That is a reduction of 300 to 450 calories per batch just from the oil alone, without touching anything else.

The secret to keeping it flavourful with less oil is technique. You cook the onions and tomatoes longer and on slightly lower heat, allowing them to break down properly and develop depth. You use ginger and garlic generously since they carry enormous flavour. And you finish with fresh coriander, ginger juliennes and a squeeze of lemon, which brightens the whole dish without adding a single calorie.

A non-stick karahi or heavy bottomed pan also helps significantly. You can sauté and cook without food sticking, which means less oil as a functional necessity.

Recipe 1: Classic Tomato Based Chicken Karahi

01
Classic Tomato Based Chicken Karahi (Low Oil)
The karahi most people grew up eating, deep red, rich in tomato, fragrant with whole spices, just made cleaner.
280 to 310Calories
35gProtein
30 minPrep + Cook
500g chicken, bone-in pieces, skin removed
3 large tomatoes, roughly chopped
1 medium onion, finely sliced
1 tbsp ginger garlic paste
1 tsp cumin seeds
1 tsp coriander powder
1/2 tsp turmeric
1 tsp red chili powder, adjust to taste
1/2 tsp garam masala
1.5 tbsp oil, plus salt to taste
  • 1
    Heat 1.5 tablespoons of oil in a non-stick karahi or heavy pan on medium high heat. Add cumin seeds and let them sizzle for 20 seconds.
  • 2
    Add the sliced onion and cook, stirring regularly, for 7 to 8 minutes until deep golden. Properly caramelized onion gives the karahi body and sweetness without needing extra oil.
  • 3
    Add ginger garlic paste and cook for 2 minutes, stirring continuously so it does not catch.
  • 4
    Add turmeric, red chili powder and coriander powder. Stir for 30 seconds.
  • 5
    Add the chopped tomatoes. Cook on medium heat, pressing them down with the back of your spoon, for 10 to 12 minutes until they fully break down into a thick, dark masala. Do not rush this step.
  • 6
    Add the chicken pieces and stir to coat completely. Cover and cook on medium low for 15 to 18 minutes, stirring occasionally, until the chicken is fully cooked and the oil begins to separate from the masala.
  • 7
    Uncover, increase heat to high, and stir fry for 2 to 3 minutes to finish and develop a slightly dry, concentrated masala.

Finish with garam masala, a squeeze of lemon, fresh ginger juliennes, green chilies and coriander. Your family will not know you used less than a third of the oil.

Recipe 2: White Karahi (Dahi Chicken Karahi)

02
White Karahi, Dahi Chicken Karahi, No Tomato
Made with yogurt instead of tomatoes, slightly less common but deeply delicious, with a creamier, tangier flavour profile.
260 to 290Calories
37gProtein
28 minPrep + Cook
500g chicken, bone-in pieces, skin removed
3/4 cup plain yogurt, whisked smooth
1 tbsp ginger garlic paste
1 tsp cumin seeds
1 tsp black pepper, freshly ground
1/2 tsp white pepper, optional
1/2 tsp coriander powder
3 to 4 green chilies, slit lengthways
1.5 tbsp oil, plus salt to taste
  • 1
    Heat oil in a non-stick karahi. Add cumin seeds and slit green chilies and let them sizzle for 30 seconds.
  • 2
    Add ginger garlic paste and cook for 90 seconds on medium heat, stirring continuously.
  • 3
    Add the chicken pieces and cook on high heat for 4 to 5 minutes, turning the pieces, until they develop some colour on the outside.
  • 4
    Reduce heat to medium. Add the whisked yogurt slowly, stirring constantly so it does not split. Add salt, black pepper, white pepper and coriander powder.
  • 5
    Cover and cook on medium low for 15 to 18 minutes until the chicken is fully cooked, stirring occasionally.
  • 6
    Uncover and increase heat to high. Stir fry for 3 to 4 minutes until the masala thickens and clings to the chicken.

Finish with fresh ginger juliennes, coriander and a small knob of butter if using. The freshly ground black pepper is essential here, it is what gives white karahi its distinctive warmth and depth.

Recipe 3: Roasted Green Masala Chicken Karahi

03
Roasted Green Masala Chicken Karahi
Made with fresh herbs and chilies rather than tomatoes or yogurt, lighter, brighter and completely different in flavour.
250 to 275Calories
36gProtein
30 minPrep + Cook
500g chicken, boneless cubes or bone-in pieces
1 tbsp ginger garlic paste, plus 1 tbsp oil
1 cup fresh coriander, packed, for the masala
4 to 5 green chilies, adjust to heat preference
6 to 7 fresh mint leaves, juice of half a lemon
2 tbsp plain yogurt, 1/2 tsp cumin powder
1 tsp cumin seeds, for tempering
2 to 3 dried red chilies, a few curry leaves
  • 1
    Blend all green masala ingredients together into a smooth paste. Set aside.
  • 2
    Heat oil in a non-stick karahi on medium high. Add cumin seeds, dried red chilies and curry leaves and let them sizzle for 20 seconds.
  • 3
    Add ginger garlic paste and cook for 1 minute.
  • 4
    Add the chicken and cook on high heat for 5 to 6 minutes, turning pieces regularly until lightly browned on the outside.
  • 5
    Pour the green masala over the chicken. Stir well to coat completely.
  • 6
    Cover and cook on medium low for 14 to 16 minutes until the chicken is fully cooked, stirring occasionally.
  • 7
    Uncover, increase heat, and stir fry for 3 to 4 minutes until the masala is thick and clinging to the chicken, not watery.

Finish with a squeeze of fresh lemon and extra coriander leaves. It works particularly well with naan or whole wheat roti, and it is a brilliant choice if you want something that feels light but tastes bold.

Tips to Make Any Chicken Karahi Healthier

Beyond these specific recipes, a few habits make every karahi you ever cook a little cleaner:

  • Remove the skin from chicken before cooking. Chicken skin is where most of the saturated fat lives, removing it reduces calories significantly without affecting flavour
  • Use a non-stick or cast iron pan. You need far less oil when food does not stick to the surface
  • Measure your oil. Using a tablespoon instead of pouring from the bottle cuts most people's oil use in half instantly
  • Cook the masala longer. A well developed masala needs less oil to taste rich because the ingredients themselves provide depth
  • Add a tablespoon of water if the masala starts to stick. A splash of water loosens the masala without adding calories
  • Finish with lemon and fresh herbs. These brighten flavour and make a lighter dish taste just as satisfying as a heavier one

How to Serve Karahi for Weight Loss

The karahi itself is not the problem, it is often what is served alongside it. A portion of chicken karahi with one whole wheat roti is a perfectly balanced, high protein meal. Add a side of cucumber raita and a small salad, and you have built a dinner that is genuinely nutritious without feeling like a sacrifice.

Where things go sideways is when karahi becomes three rotis with butter, followed by a bowl of white rice on the side. The dish did not fail you, the portion structure did.

Keep the karahi generous and the accompaniments controlled:

  • One whole wheat roti instead of two or three plain ones
  • Raita on the side instead of extra curry
  • A fresh salad to add volume without calories
  • Brown rice in a small portion if you want rice

Your Healthy Karahi Quick Start Checklist

  • Cut oil down to 1 to 2 tablespoons per batch
  • Remove chicken skin and use a non-stick pan
  • Cook onions and tomatoes low and slow for real depth
  • Finish with lemon, fresh herbs and ginger juliennes
  • Serve with one roti, raita and a fresh salad

Final Thoughts

A healthy chicken karahi recipe is not about compromising on flavour. It is about understanding which parts of the recipe are doing the actual work, and the oil was never the hero.

The tomatoes, ginger, garlic and spices are what make karahi taste like karahi. Use them generously, cut the oil down, cook with patience, and finish with fresh herbs and lemon. Do that, and you will make a karahi that tastes incredible and fits comfortably into a healthier lifestyle.

Pick one of these three recipes tonight and prove it to yourself.

10-Minute Morning Stretch Routine to Start Your Day Right

10-Minute Morning Stretch Routine to Start Your Day Right

Woman doing a morning stretch routine outdoors at sunrise

You wake up, roll over, and immediately feel it: that stiffness in your lower back, the tightness across your shoulders, the general feeling that your body needs another three hours of sleep before it is ready to function. And yet, life does not wait. Within minutes you are checking your phone, rushing to the kitchen, and launching into a day your body was not properly prepared for.

Here is what most people do not realize: a 10 minute morning stretch routine can completely change how your body feels from the first hour of the day. Not eventually. Immediately. No gym required, no equipment needed, just ten minutes, a small patch of floor, and the stretches in this guide.

Why Your Body Is So Stiff Every Morning

Before we get to the routine itself, it helps to understand why mornings feel so rough in the first place. When you sleep, your body stays relatively still for 6 to 9 hours. During that time, circulation slows, your muscles and connective tissues lose some of their warmth and elasticity, and synovial fluid, the natural lubricant inside your joints, settles and thickens slightly. This is why that first movement of the morning often comes with creaks, stiffness, and a general resistance to moving quickly.

Your fascia, the connective tissue that wraps around every muscle in your body, also tightens during periods of inactivity. Fascia is like plastic wrap. When it is warm and worked through regular movement, it stays pliable. When it is cold and still, it stiffens. That morning stiffness you feel is not weakness. It is physics.

A morning stretch routine works directly against all of this. It warms the muscles, lubricates the joints, stretches the fascia, and gets blood moving to tissues that have been relatively deprived of circulation all night.

What a Morning Stretch Routine Actually Does for Your Body

The benefits go well beyond just feeling less stiff. Here is what you are actually gaining:

  • Improved flexibility over time. Daily stretching gradually lengthens the muscle fibres and increases range of motion in your joints, particularly the hip flexors, hamstrings and thoracic spine
  • Reduced chronic pain. Tight muscles pull unevenly on joints and the spine. Consistent stretching corrects these imbalances, reducing the lower back pain and neck tension most desk workers accept as normal
  • Better posture throughout the day. Stretches that target the chest, hip flexors and thoracic spine counteract the forward rounded posture that develops from sitting
  • Improved mental clarity. Gentle movement in the morning increases blood flow to the brain, helping you feel more alert and focused faster
  • Lower cortisol levels. Slow, deliberate stretching activates the parasympathetic nervous system, reducing the stress hormone that naturally peaks in the early morning

How Many Minutes Should It Take

Ten minutes is the sweet spot, especially for beginners. It is long enough to meaningfully address every major muscle group and joint that needs attention after sleep. It is short enough that there is no genuine excuse to skip it. You can do this before breakfast, before a shower, even before you have fully woken up.

As you become more consistent and your body becomes more flexible, you can extend the routine to 15 to 20 minutes. But start with ten. Consistency matters far more than duration.

The 10-Minute Morning Stretch Routine

This routine moves through eight stretches in a logical sequence, starting on the floor and progressively moving to standing. Hold each stretch for 30 to 45 seconds, breathe slowly and continuously, and never stretch to the point of sharp pain. You are aiming for a gentle to moderate pulling sensation that eases slightly as you hold.

01

Knees-to-Chest

Targets: lumbar erector spinae, sacroiliac joint, glutes

30 sec

Lie on your back and bring both knees toward your chest, wrapping your arms around them. Rock gently side to side, then hold firmly for 30 seconds. This gently decompresses the lower back and releases the sacroiliac joint, a common source of morning stiffness.

02

Supine Spinal Twist

Targets: obliques, erector spinae, piriformis

30 sec each side

Arms out in a T shape, bring your right knee to your chest and let it fall across your body to the left. Turn your head gently right. Hold 30 seconds, then switch. Releases tension along the entire spine and opens the chest.

03

Cat-Cow Spinal Mobilization

Targets: erector spinae, rectus abdominis, multifidus

8 to 10 cycles

On all fours, inhale as your belly drops and you look up (cow), exhale as you round your spine and tuck your chin (cat). Move slowly through 8 to 10 cycles. This mobilizes every vertebra from tailbone to neck.

04

Child's Pose

Targets: lats, thoracic erector spinae, hip flexors

45 to 60 sec

Push your hips back toward your heels, arms extended long, forehead resting down. Breathe deeply and let gravity release your lower back and hips. If you only do one stretch every morning, make it this one.

05

Low Lunge Hip Flexor

Targets: iliopsoas, rectus femoris, anterior hip capsule

30 sec each side

Step your right foot forward, lower your left knee down, and push your hips forward and down. The most important stretch for anyone who sits for long periods, since it reverses hip flexor tightness that pulls on the lower back.

06

Seated Hamstring Stretch

Targets: hamstrings, gastrocnemius

35 to 40 sec

Sit with both legs extended, hinge forward from the hips (not the spine) until you feel a stretch along the back of both thighs. Tight hamstrings pull the pelvis into a posterior tilt, flattening your lower back curve.

07

Chest Opener

Targets: pectoralis major and minor, anterior deltoids

30 sec

Stand and clasp your hands behind your back, straighten your arms and lift them slightly while opening your chest. Counteracts the forward shoulder pull from hours of curled sleeping posture.

08

Neck and Upper Trap Stretch

Targets: upper trapezius, sternocleidomastoid, levator scapulae

25 to 30 sec each side

Drop your right ear toward your right shoulder without shrugging. For a deeper stretch, place your right hand gently on the left side of your head and let its weight deepen the stretch.

Your Routine at a Glance

StretchTarget AreaHold Time
Knees-to-ChestLower back, glutes30 sec
Supine Spinal TwistSpine, hips30 sec each side
Cat-CowFull spine, core8 to 10 slow cycles
Child's PoseBack, hips, lats45 to 60 sec
Low Lunge Hip FlexorHip flexors, quads30 sec each side
Seated Hamstring StretchHamstrings, calves35 to 40 sec
Chest OpenerChest, shoulders30 sec
Neck and Upper Trap StretchNeck, upper back25 to 30 sec each side

Move through this sequence slowly and without rushing. The entire routine fits comfortably within 10 minutes.

When Is the Best Time to Stretch

Right after waking up is ideal, before coffee, before your phone, before anything else. Your body is in a naturally receptive state immediately after sleep. While your muscles are initially stiff, they respond quickly to gentle movement, and starting early means you carry the benefits, looser joints, better posture, a calmer nervous system, into the entire rest of your morning.

If mornings are truly impossible, the second best time is mid morning before you have been sitting at a desk for hours. What matters most is consistency. Daily practice for two weeks produces genuinely noticeable changes in how your body feels and moves.

Tips to Make This a Daily Habit

Starting is the easy part. Showing up every morning is the real challenge. A few things that help:

  • Keep a yoga mat unrolled beside your bed. The visual cue removes friction and makes it easy to start without thinking
  • Do it before looking at your phone. Checking notifications first thing activates mental stress before your body is ready
  • Pair it with something you enjoy: calm music, a podcast, or simply the quiet of the morning before anyone else is awake
  • Start with just 5 minutes if 10 feels like too much. Half the routine is infinitely better than none of it
  • Track your streak. A simple checkmark on a calendar creates a visual chain you will not want to break

Your Morning Stretch Quick Start Checklist

  • Start right after waking up, before coffee or your phone
  • Move through all 8 stretches, floor to standing
  • Hold each stretch 30 to 45 seconds and breathe slowly
  • Never push into sharp pain, ease into each stretch
  • Do it daily for two weeks to feel the real difference

Final Thoughts

A 10 minute morning stretch routine will not just fix your stiffness. Over time, it improves your posture, reduces chronic pain, sharpens your focus, and sets a genuinely positive tone for the day, all before you have had your first cup of tea.

The stretches in this guide target every area that matters: your lumbar spine, thoracic vertebrae, hip flexors, hamstrings, chest and neck. They are sequenced to warm your body gradually and feel good rather than painful.

Ten minutes. Eight stretches. Every morning. That is one of the smallest investments you can make in your body, and one of the highest returns you will get.

Calorie Deficit 101: How Much Should You Really Eat

Calorie Deficit 101: How Much Should You Really Eat

Balanced meal plate with grilled chicken, brown rice and fresh vegetables for calorie deficit weight loss

You have been eating less. You have been trying harder. And the scale still is not moving the way you expected. So you cut more. Eat less. Feel miserable. Still nothing dramatic happens, or worse, you lose a few pounds and then gain them all back within weeks.

Sound familiar? You are not failing at weight loss. You are probably just misunderstanding one of the most fundamental concepts behind it. That concept is the calorie deficit, and once you truly understand how it works, everything else about weight loss starts to make a lot more sense.

What Is a Calorie Deficit, Really

A calorie is simply a unit of energy. Your body needs a certain amount of energy every day just to keep you alive and functioning: breathing, pumping blood, digesting food, regulating temperature, thinking. This is called your Total Daily Energy Expenditure, or TDEE, and it is the total number of calories your body burns in a day.

A calorie deficit happens when you consume fewer calories than your TDEE. Your body still needs that energy, so it dips into stored body fat to make up the difference. That stored fat gets burned for fuel, and that is how you lose weight.

It really is that fundamental. All successful weight loss approaches, low carb, intermittent fasting, clean eating, portion control, work because they all ultimately create a calorie deficit. The method varies. The mechanism does not.

How Many Calories Do You Actually Need

This is where most people get it wrong, because "eat less" without context is meaningless. Less than what? Your TDEE depends on your Basal Metabolic Rate, the calories your body burns at complete rest just to keep your organs functioning, and your activity level, how much you move throughout the day through exercise and general daily movement.

A quick way to estimate your TDEE is to use the Mifflin St Jeor formula:

For Women

BMR = (10 x weight in kg) + (6.25 x height in cm) minus (5 x age) minus 161

For Men

BMR = (10 x weight in kg) + (6.25 x height in cm) minus (5 x age) + 5

Then multiply your BMR by an activity factor:

  • Sedentary, desk job, little movement: x 1.2
  • Lightly active, light exercise 1 to 3 days a week: x 1.375
  • Moderately active, exercise 3 to 5 days a week: x 1.55
  • Very active, hard exercise 6 to 7 days a week: x 1.725

The result is your approximate TDEE, the number of calories you need to maintain your current weight. Let us say that number comes out to 2,000 calories per day. To lose weight, you need to consistently eat below that number. How far below brings us to the most important question of all.

How Big Should Your Calorie Deficit Be

Here is where things get nuanced, and where most diets go dramatically wrong. The commonly accepted rule is that one pound of fat contains approximately 3,500 calories. So to lose one pound per week, you would need a deficit of 500 calories per day. That is the standard starting point, and it works well for most people.

A 300 to 500 calorie daily deficit is considered moderate and sustainable. At this level:

  • You are losing roughly 0.5 to 1 pound per week
  • You are not depriving your body dramatically
  • Energy levels stay reasonable and hunger is manageable
  • Muscle mass is largely preserved

This might sound slow. But 0.5 to 1 pound per week is 25 to 50 pounds over the course of a year. Sustainable, compounding, real progress. The problem comes when people get impatient and go too aggressive.

Why a Massive Calorie Deficit Backfires

Cutting 1,000 plus calories below your TDEE feels like a faster route. And short term, the scale does drop faster, but most of that initial drop is not fat. It is water weight and glycogen loss, which rebounds the moment you eat normally again.

More critically, severe calorie restriction triggers something called metabolic adaptation. Your body is remarkably intelligent. When it senses a dramatic reduction in food intake, it interprets this as a threat, as if food is genuinely scarce. In response, it lowers your metabolic rate to conserve energy. Hormones like leptin drop, reducing your feeling of fullness, ghrelin rises, increasing hunger, and your body starts burning fewer calories to protect itself.

This is why people hit plateaus on crash diets. They are eating very little but not losing anymore, because their body has adapted down to match. The solution is not eating even less. It is eating enough to keep your metabolism functioning while still maintaining a moderate deficit.

A good rule of thumb: never eat below 1,200 calories per day if you are a woman, or 1,500 if you are a man, regardless of how aggressive your weight loss goal is. Below these thresholds, it becomes very difficult to get adequate nutrition, and metabolic damage becomes a real concern.

How to Create a Deficit Without Feeling Starved

This is the practical part, because knowing the theory is one thing, but actually executing it every day is another.

01

Prioritize Protein at Every Meal

Fullness

Protein is the most satiating macronutrient. It keeps you fuller longer than carbs or fat and has a higher thermic effect, meaning your body burns more calories just digesting it. Aim for roughly 1.6 to 2.2 grams per kilogram of body weight daily. For a 70kg person, that is 112 to 154 grams a day.

02

Fill Half Your Plate with Vegetables

Volume

Vegetables are high in volume, high in fiber and genuinely low in calories. A large bowl of salad with greens, cucumber and tomato might be 80 to 120 calories, while the same volume in rice would be 300 to 400 calories.

03

Do Not Drink Your Calories

Hidden Calories

A can of soda is about 140 calories, a sweetened coffee drink can be 250 to 350 calories. Switching most drinks to water, sparkling water or plain tea can create a 200 to 400 calorie daily deficit without changing a single thing you eat.

04

Track Your Food, At Least for a While

Awareness

Research shows the average person underestimates their calorie intake by 20 to 40%. Using an app like MyFitnessPal for 2 to 4 weeks builds a level of awareness that sticks permanently, even after you stop tracking.

What About Exercise, Does It Change the Equation

Yes, but perhaps not as much as you think. Exercise burns additional calories, which can either deepen your deficit or give you a little more room to eat. The challenge is that most people significantly overestimate how many calories exercise burns.

A 30 minute moderate run burns roughly 250 to 300 calories for the average person. That is one small snack, and it is easy to eat those calories back, sometimes unconsciously, because exercise tends to increase appetite.

Exercise is enormously valuable for your health, your mood, your muscle mass and your long term metabolism. But for weight loss specifically, the kitchen is where the deficit is primarily created. Think of exercise as the multiplier, not the foundation.

Practical Calorie Targets to Start With

Here is a simple starting framework based on your estimated TDEE:

GoalCalculation
Lose weight, moderateTDEE minus 300 to 500 calories per day
Lose weight, aggressive but sustainableTDEE minus 500 to 750 calories per day
Maintain current weightEat at TDEE
Build muscle, minimal fat gainTDEE plus 200 to 300 calories per day

For most people beginning their weight loss journey, starting at a 400 calorie daily deficit is a sensible, sustainable entry point. Reassess every 3 to 4 weeks, since your TDEE decreases slightly as you lose weight and your deficit needs to be recalculated periodically to stay on track.

Your Calorie Deficit Quick Start Checklist

  • Calculate your TDEE using the Mifflin St Jeor formula
  • Start with a moderate 300 to 500 calorie daily deficit
  • Prioritize protein and fill half your plate with vegetables
  • Cut liquid calories and track your food for a few weeks
  • Never drop below 1,200 (women) or 1,500 (men) calories a day

Final Thoughts

A calorie deficit for weight loss is not about eating as little as humanly possible. It is about eating slightly less than your body needs, consistently, sustainably and intelligently, so that your body draws on stored fat to make up the difference.

Moderate deficit. High protein. Plenty of vegetables. Minimal liquid calories. Enough food that you do not feel punished.

That formula, applied over weeks and months rather than desperate days, is how real, lasting weight loss actually happens. Not through suffering, but through consistency and understanding. Now you have both. Use them.